
What are the essential features of backoffice development? I would say these four: viewing data lists, creating data, viewing details while editing, and deletion. In today's blog post, we'll create a backoffice page with these features using PostgreSQL, one of the most widely used databases.
As you may know, the features mentioned above are also known as CRUD, which are fundamental to most software. These features are typically provided by databases or REST APIs used in backoffice development. By directly connecting a database to Hops to build your backoffice, you can develop data management pages without frontend programming costs.
Let's create a backoffice page with CRUD functionality by connecting a PostgreSQL server data source.
Sample Data Introduction
Let's build a backoffice for a service selling daily necessities like shampoo, soap, and toothbrushes. We'll create backoffice pages to manage the most important data: customer information. The data below is sample data provided by Hops, which you can use when starting the demo.
Here's the structure of the data we'll use today:
Customers Table
| Column Name | Description | Note |
|---|---|---|
| id | Customer's unique ID | Primary key |
| name | Customer's name | |
| Customer's email | ||
| phone_number | Customer's phone |
Products Table
| Column Name | Description | Note |
|---|---|---|
| id | Product's unique ID | Primary key |
| name | Product name | |
| price | Product price | |
| category | Product category | |
| description | Product description | Stored as HTML |
Orders Table
| Column Name | Description | Note |
|---|---|---|
| id | Order's unique ID | Primary key |
| customer_id | Customer's unique key | Foreign key to customers table |
| product_id | Ordered product ID | Foreign key to products table |
| quantity | Order quantity | |
| delivered_date | Delivery date | Null for undelivered orders |
| order_date | Order date |
Viewing Data Lists
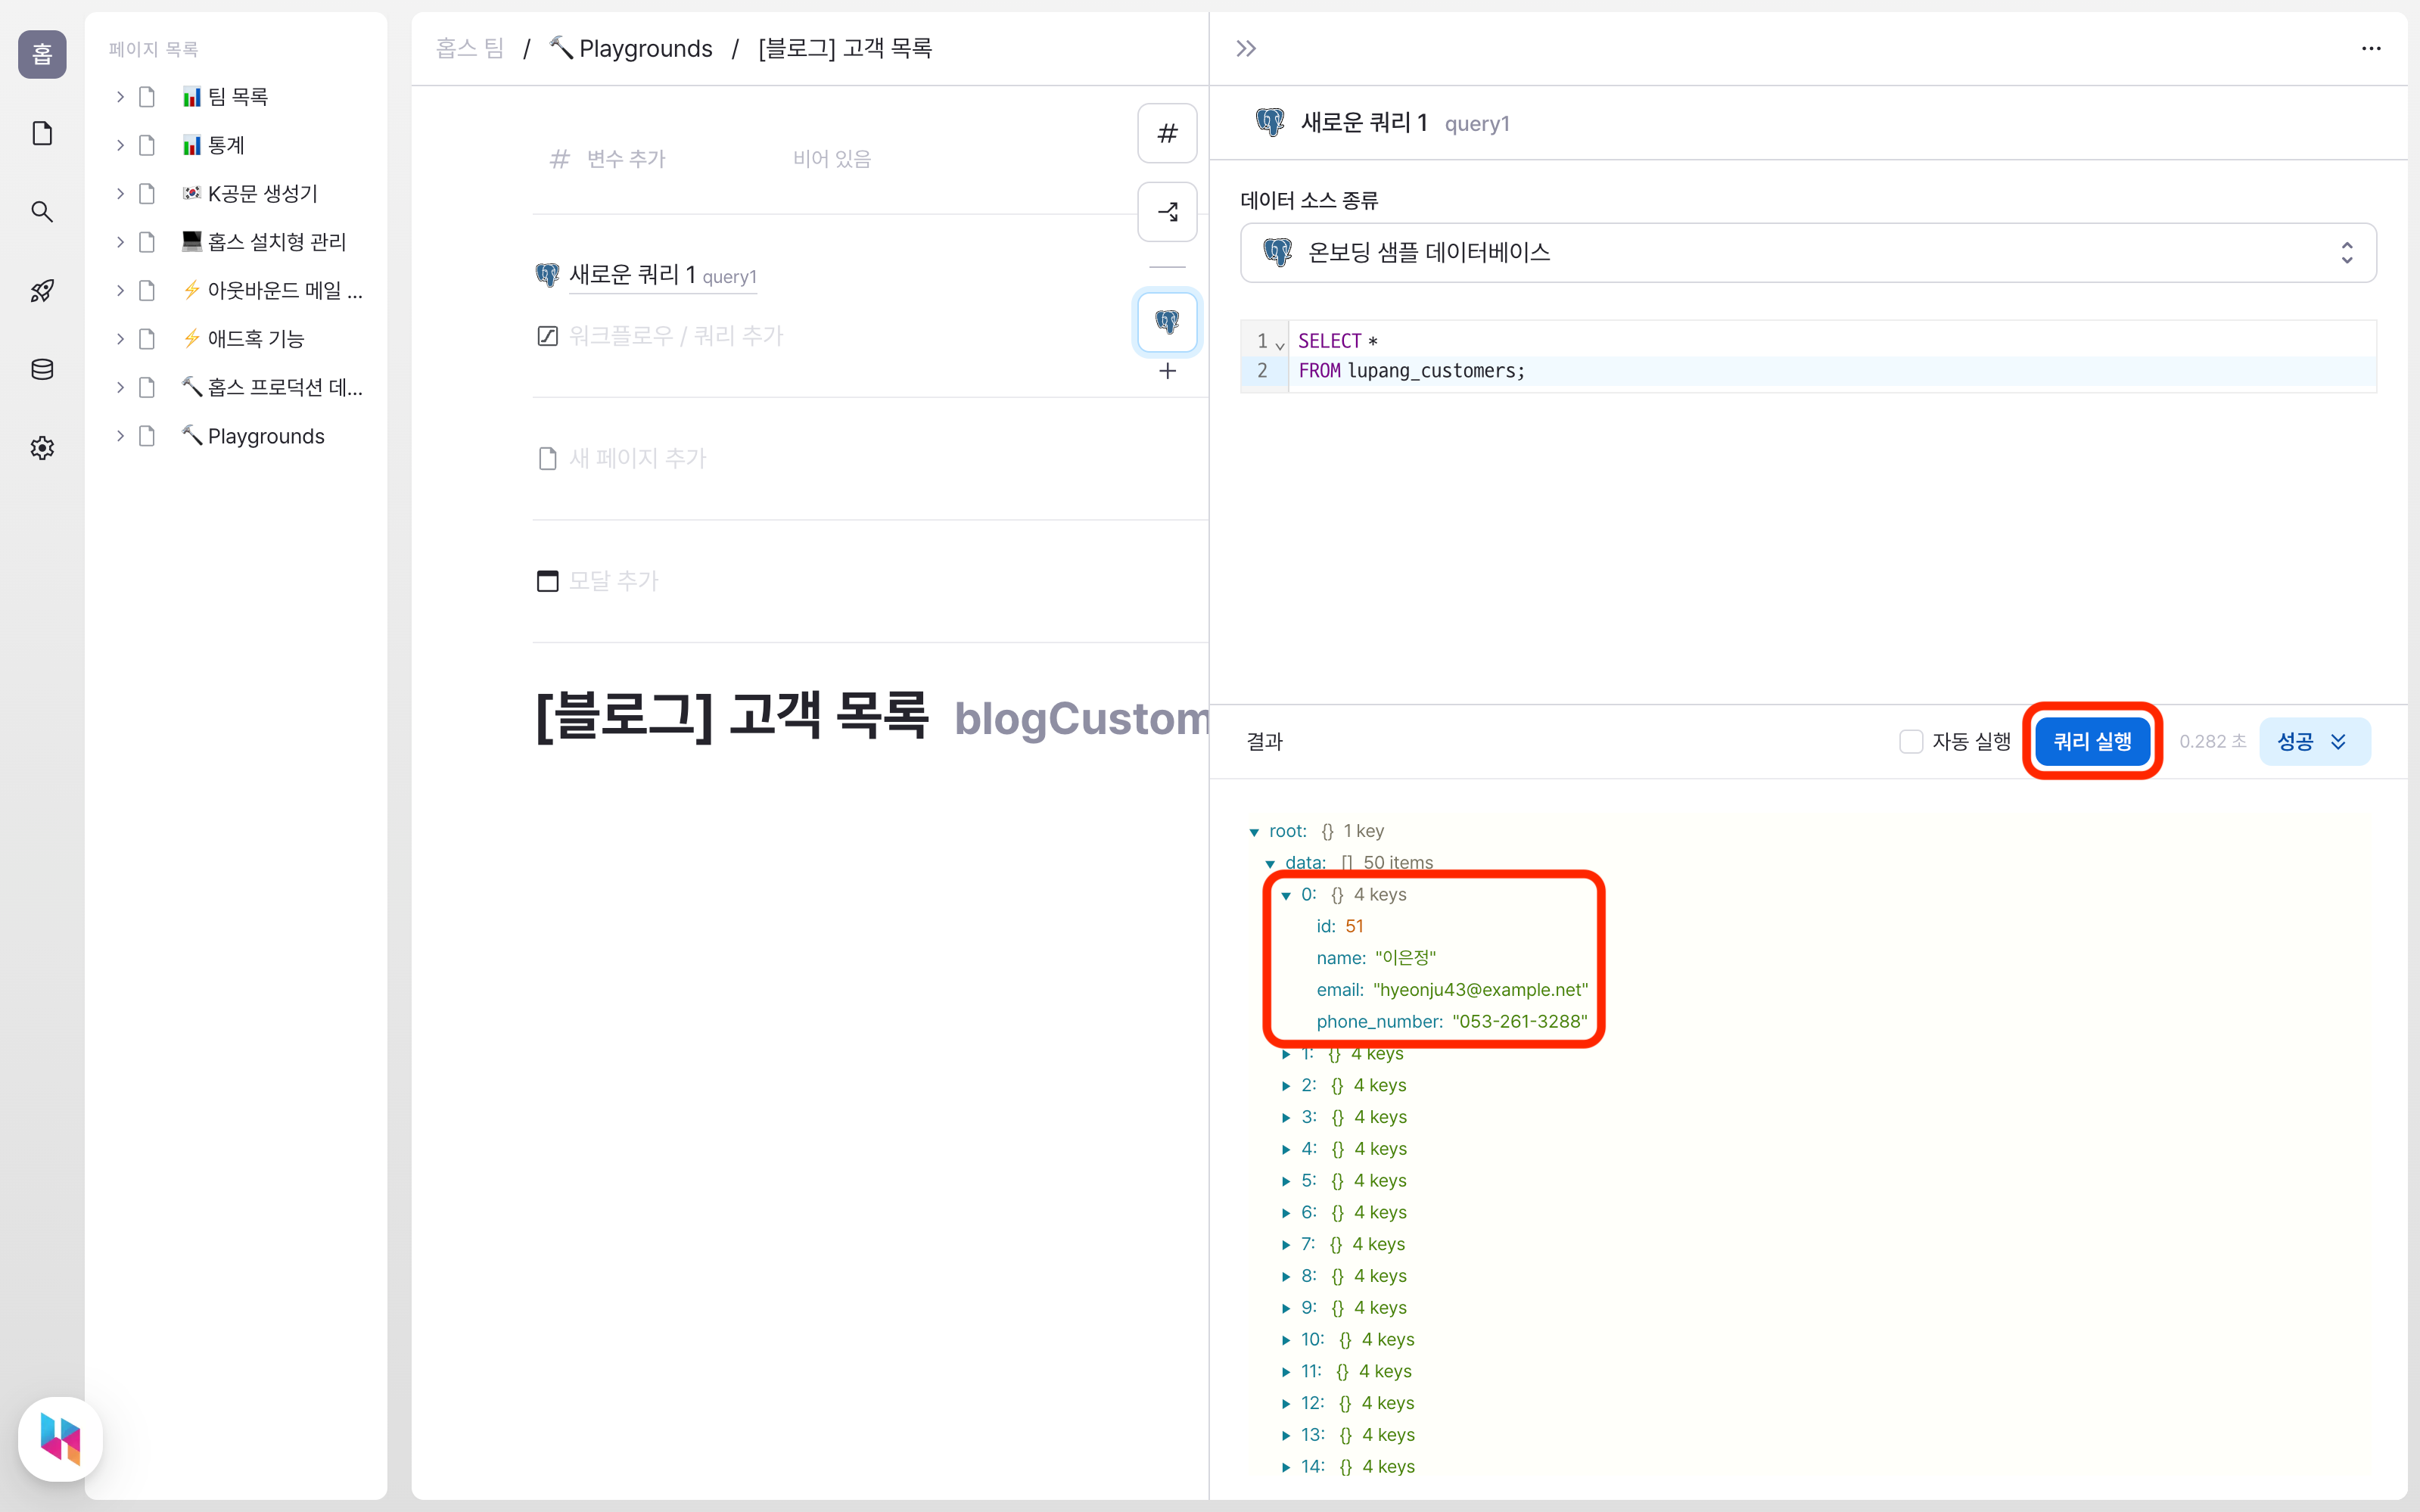
Let's start by creating a customer list. We'll select the "Onboarding Sample Database" connected to the PostgreSQL server data source. After writing SQL, you can immediately see the query results when executed.
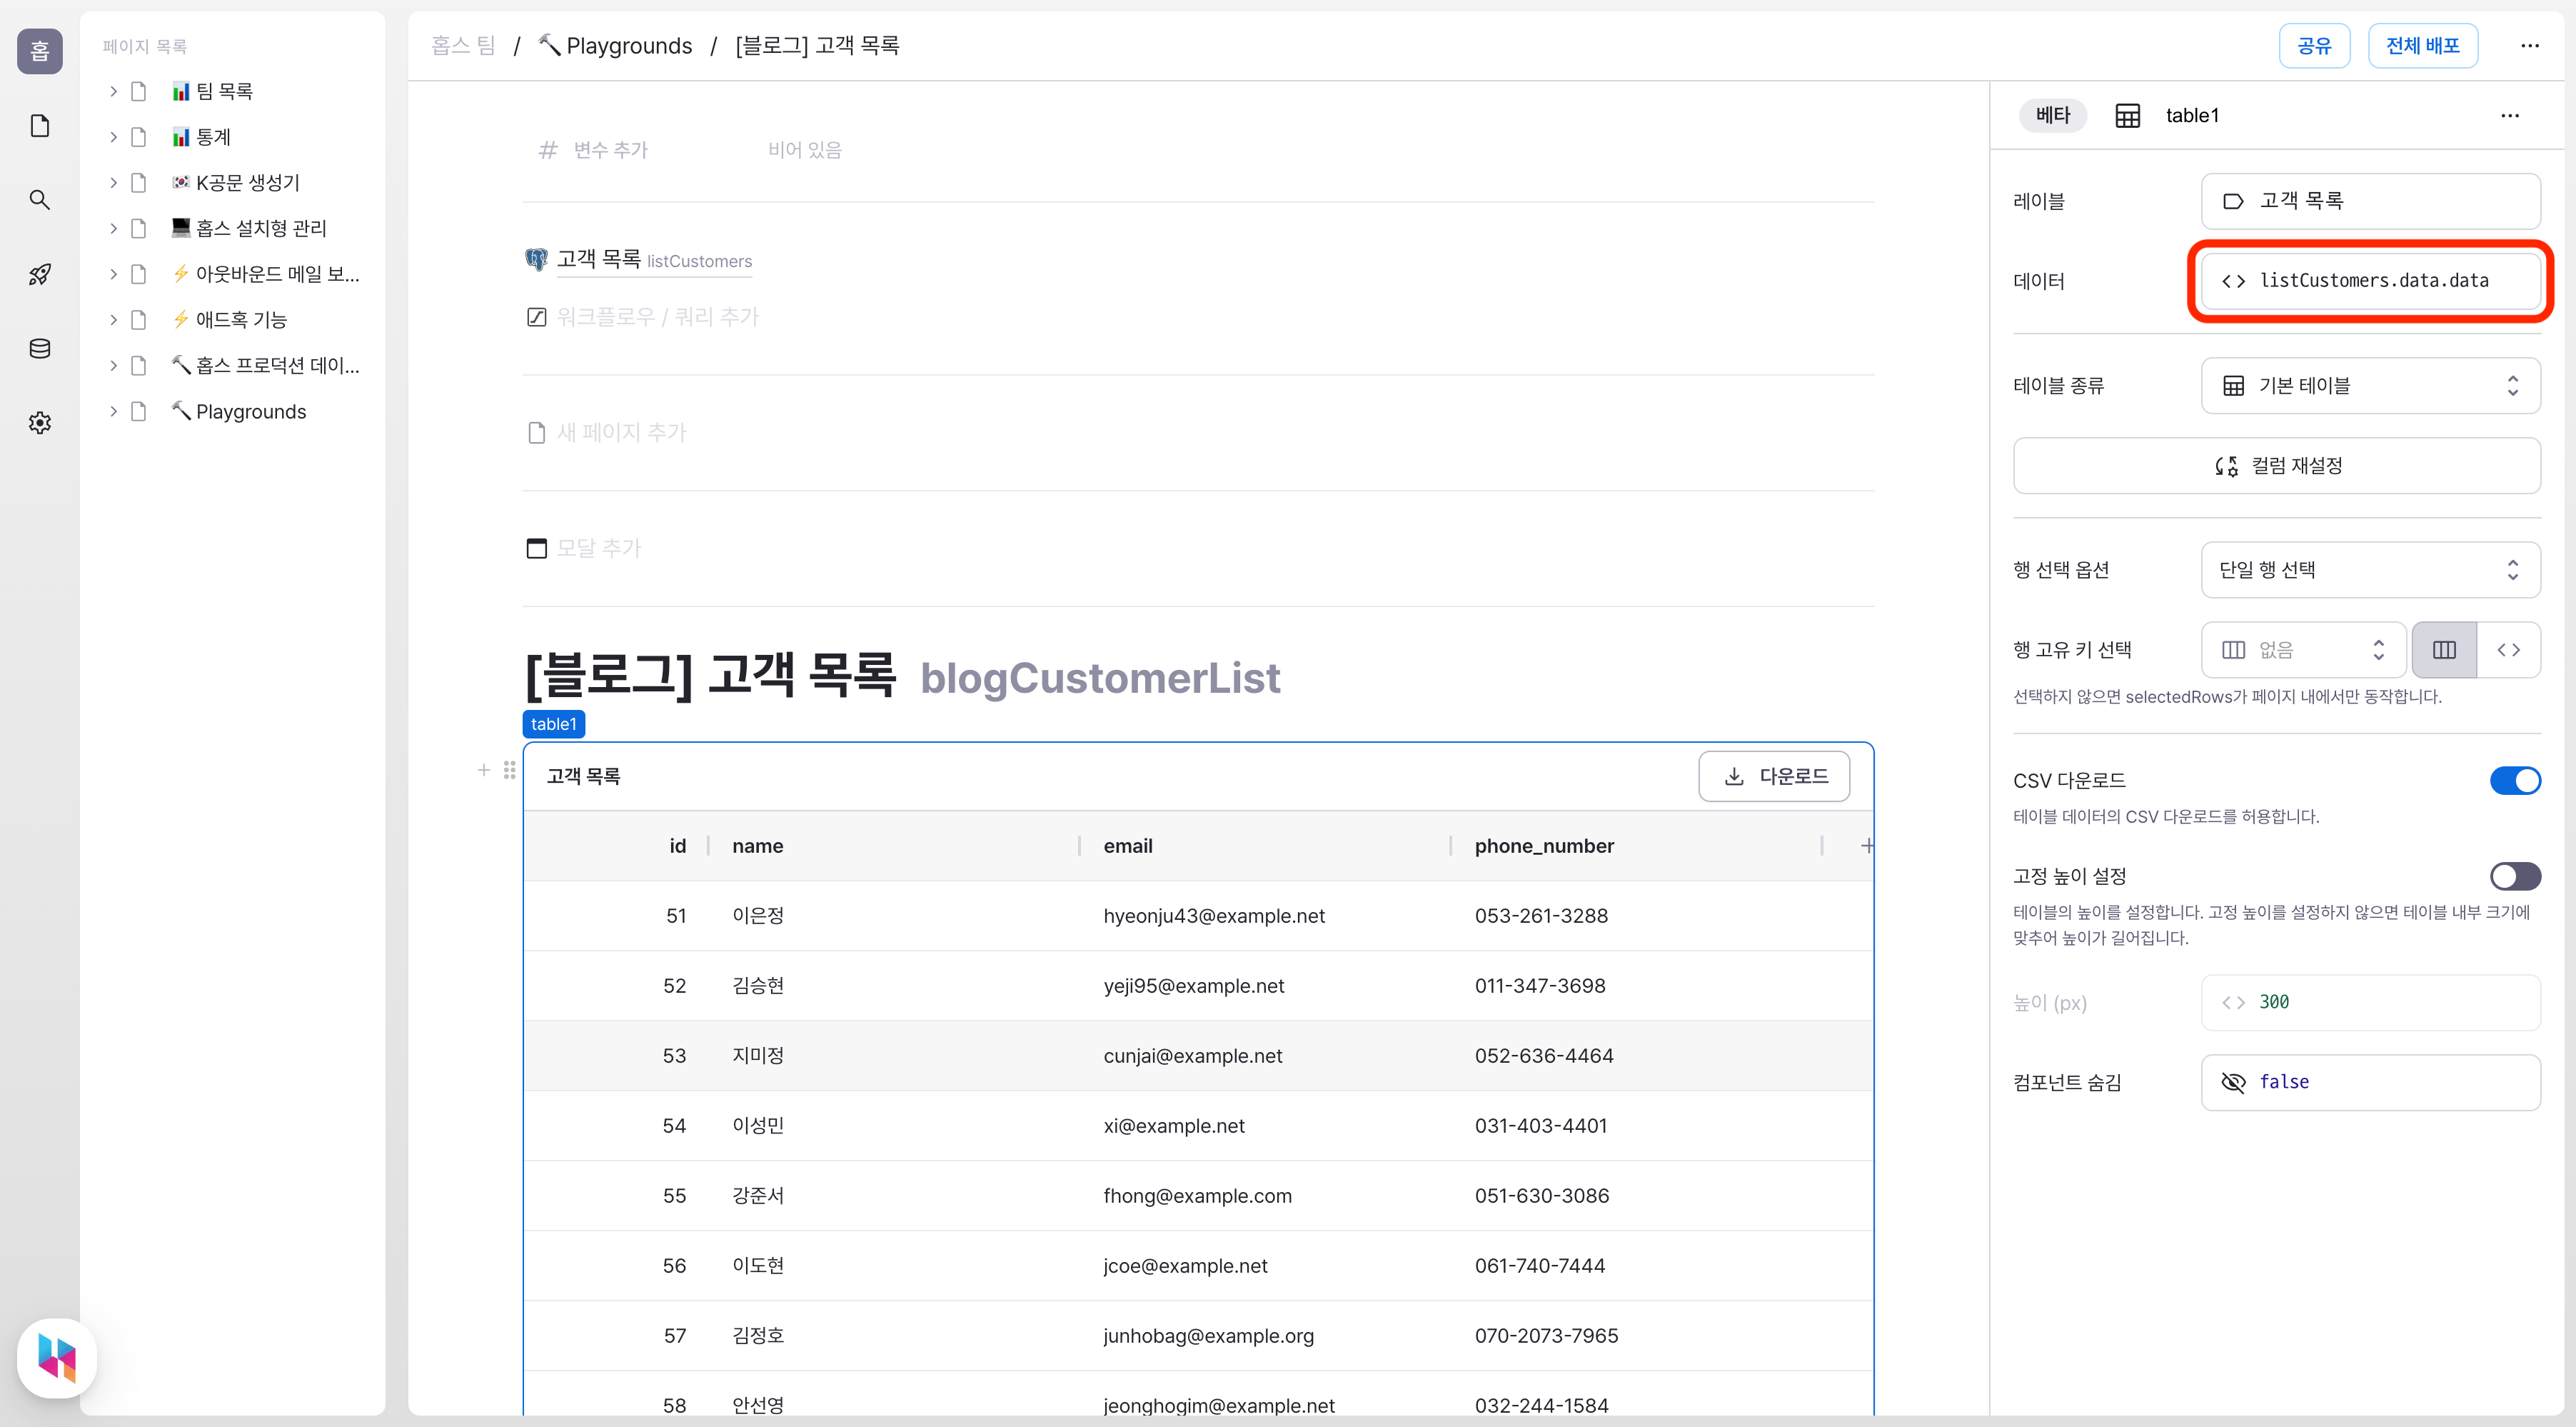
To view data in a list, add a table component and enter the query results as data. After changing the query name to listCustomers,
enter listCustomers.data.data code and click reset columns to immediately display the data.
The property name to retrieve query results is .data, and since relational database data sources return values of type { data: object[] },
we get the results using listCustomers.data.data.
Using a data table provides immediate access to paging, filtering, and sorting features. Change the table type to data table. You can also immediately change column names through column settings. Click the settings button next to the column title and set the column name in column details.

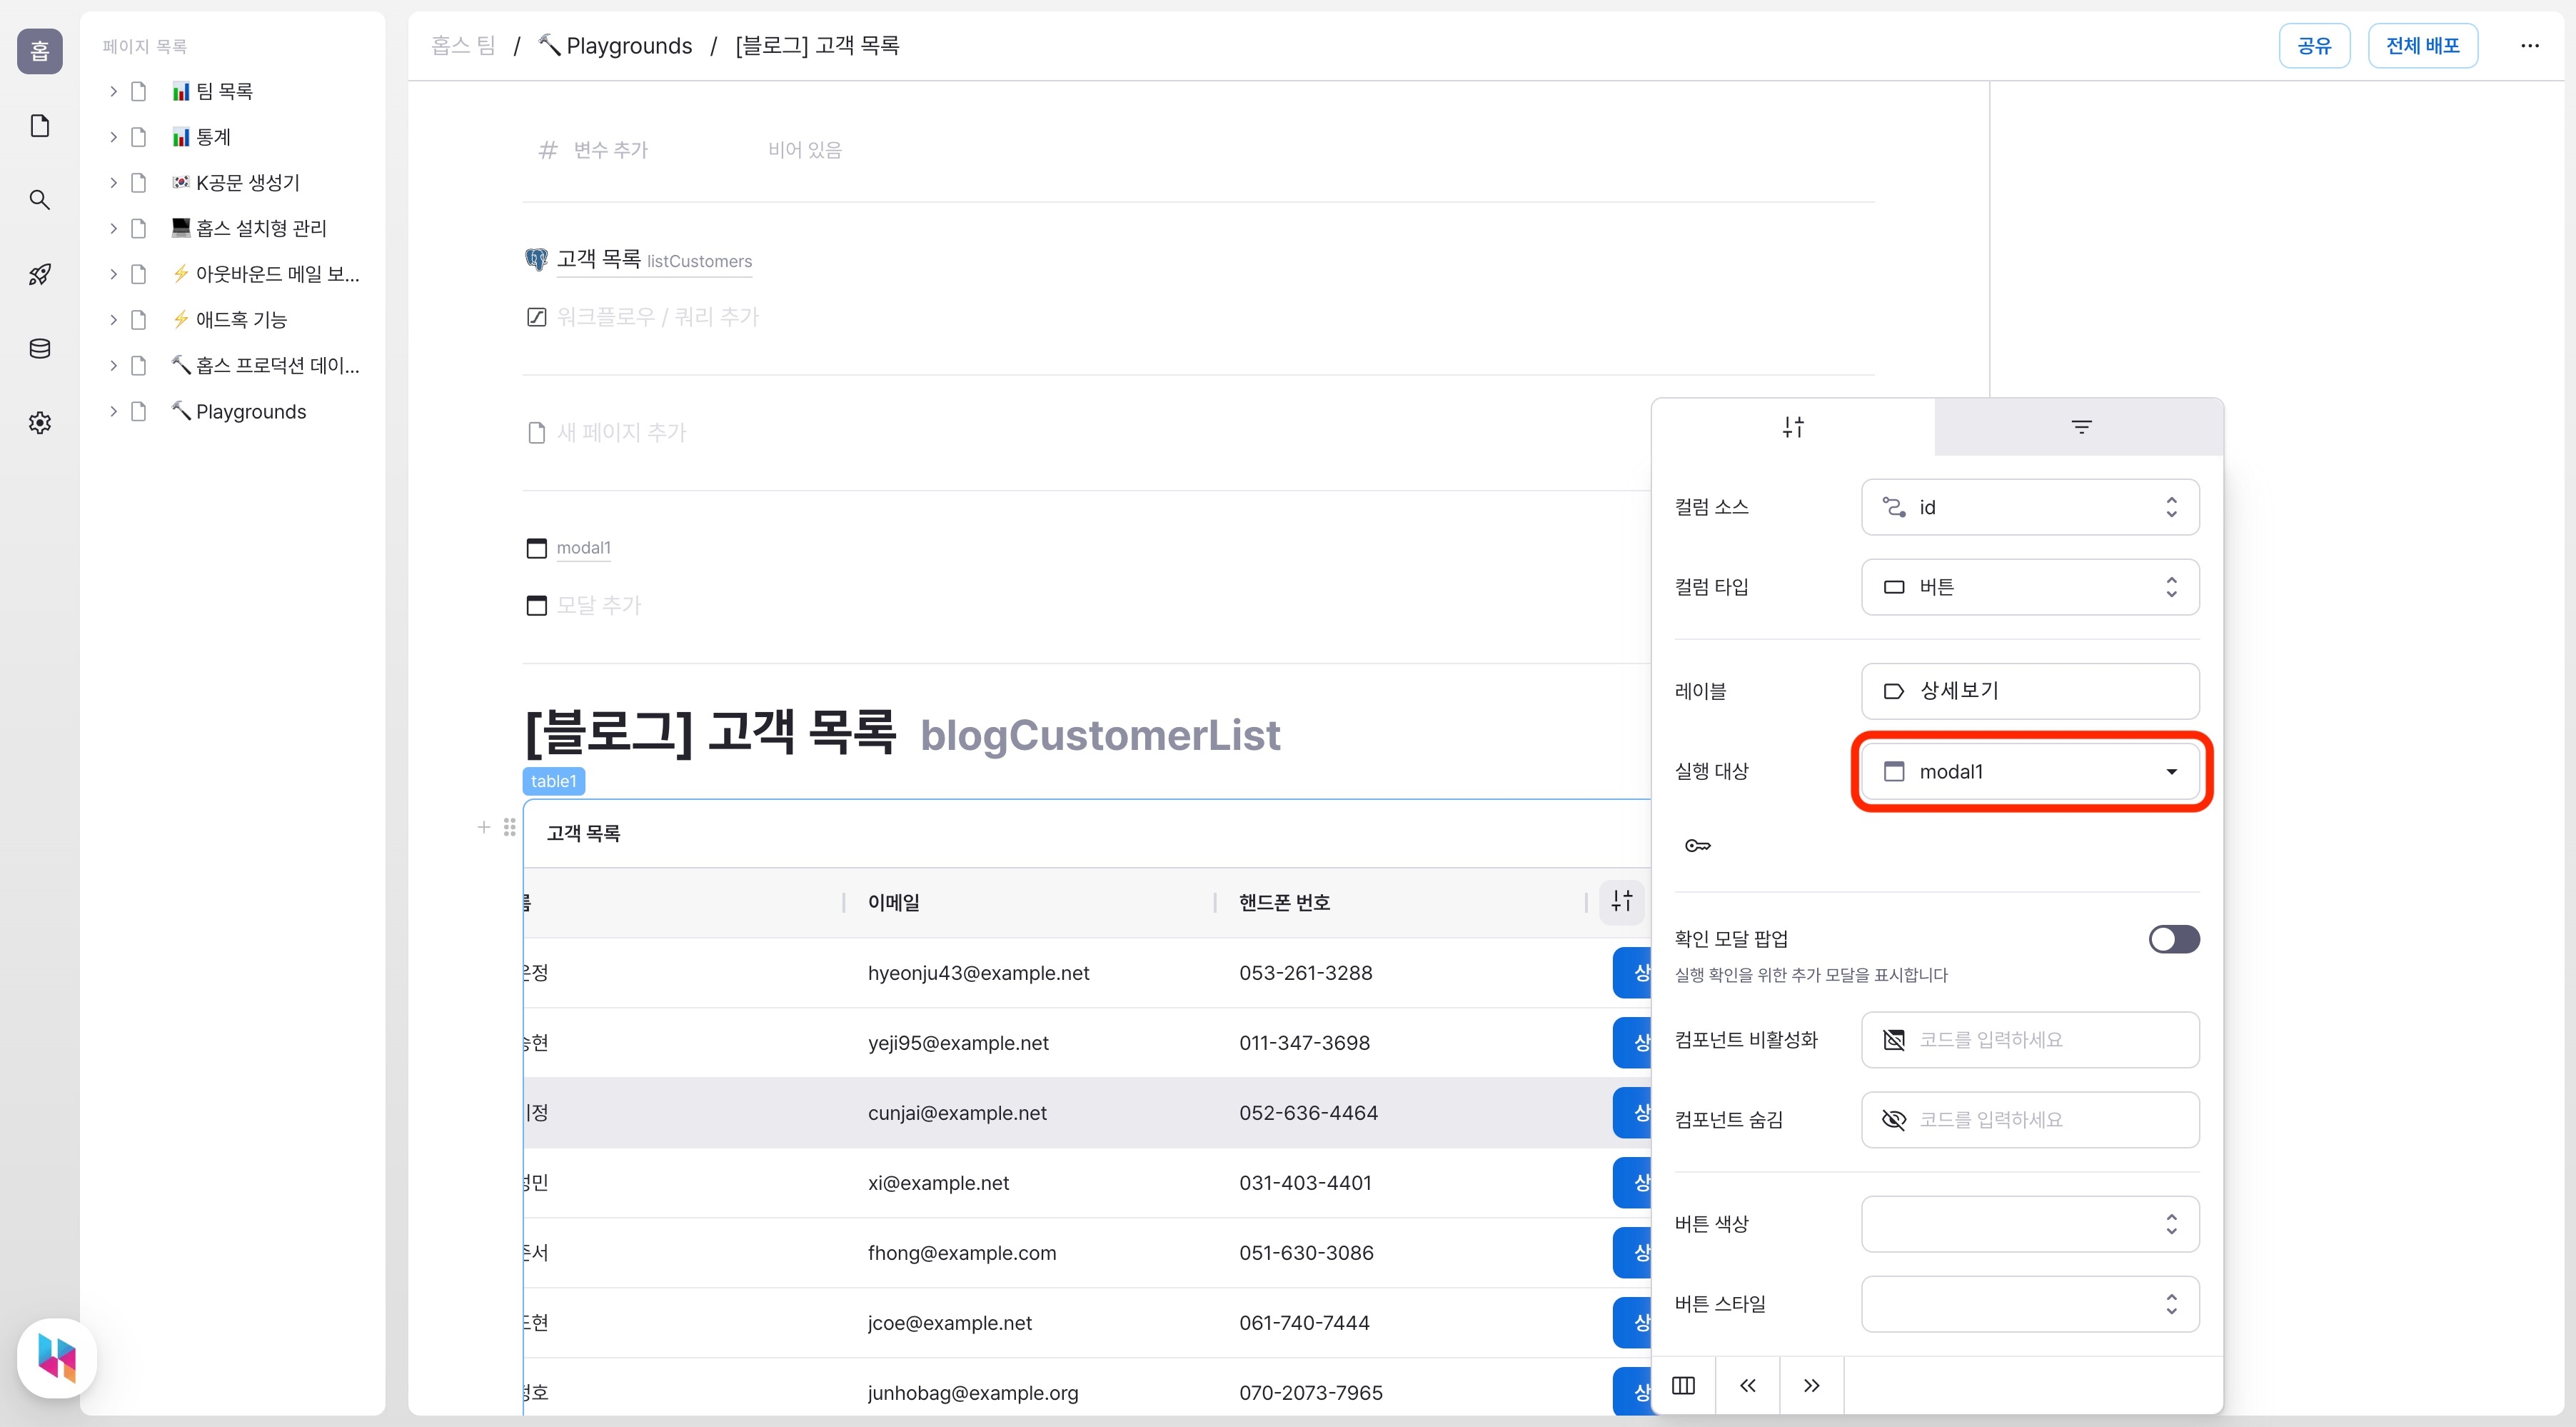
Add buttons directly to the table to view and edit data individually. Since we want to view data in a modal, we've set it to open a modal.
Creating Data
Let's add a button to create new customers. Add a button component at the top of the table and set it to open a modal when clicked.
Add a form to the modal for entering customer information. The form includes text fields for the customer's name, email, and phone number.
When the save button is clicked, we'll execute a query to create a new customer. Write an INSERT query using the form values.
After creating the data, we need to refresh the customer list. Add the list refresh query to be executed after the create query.
Viewing and Editing Details
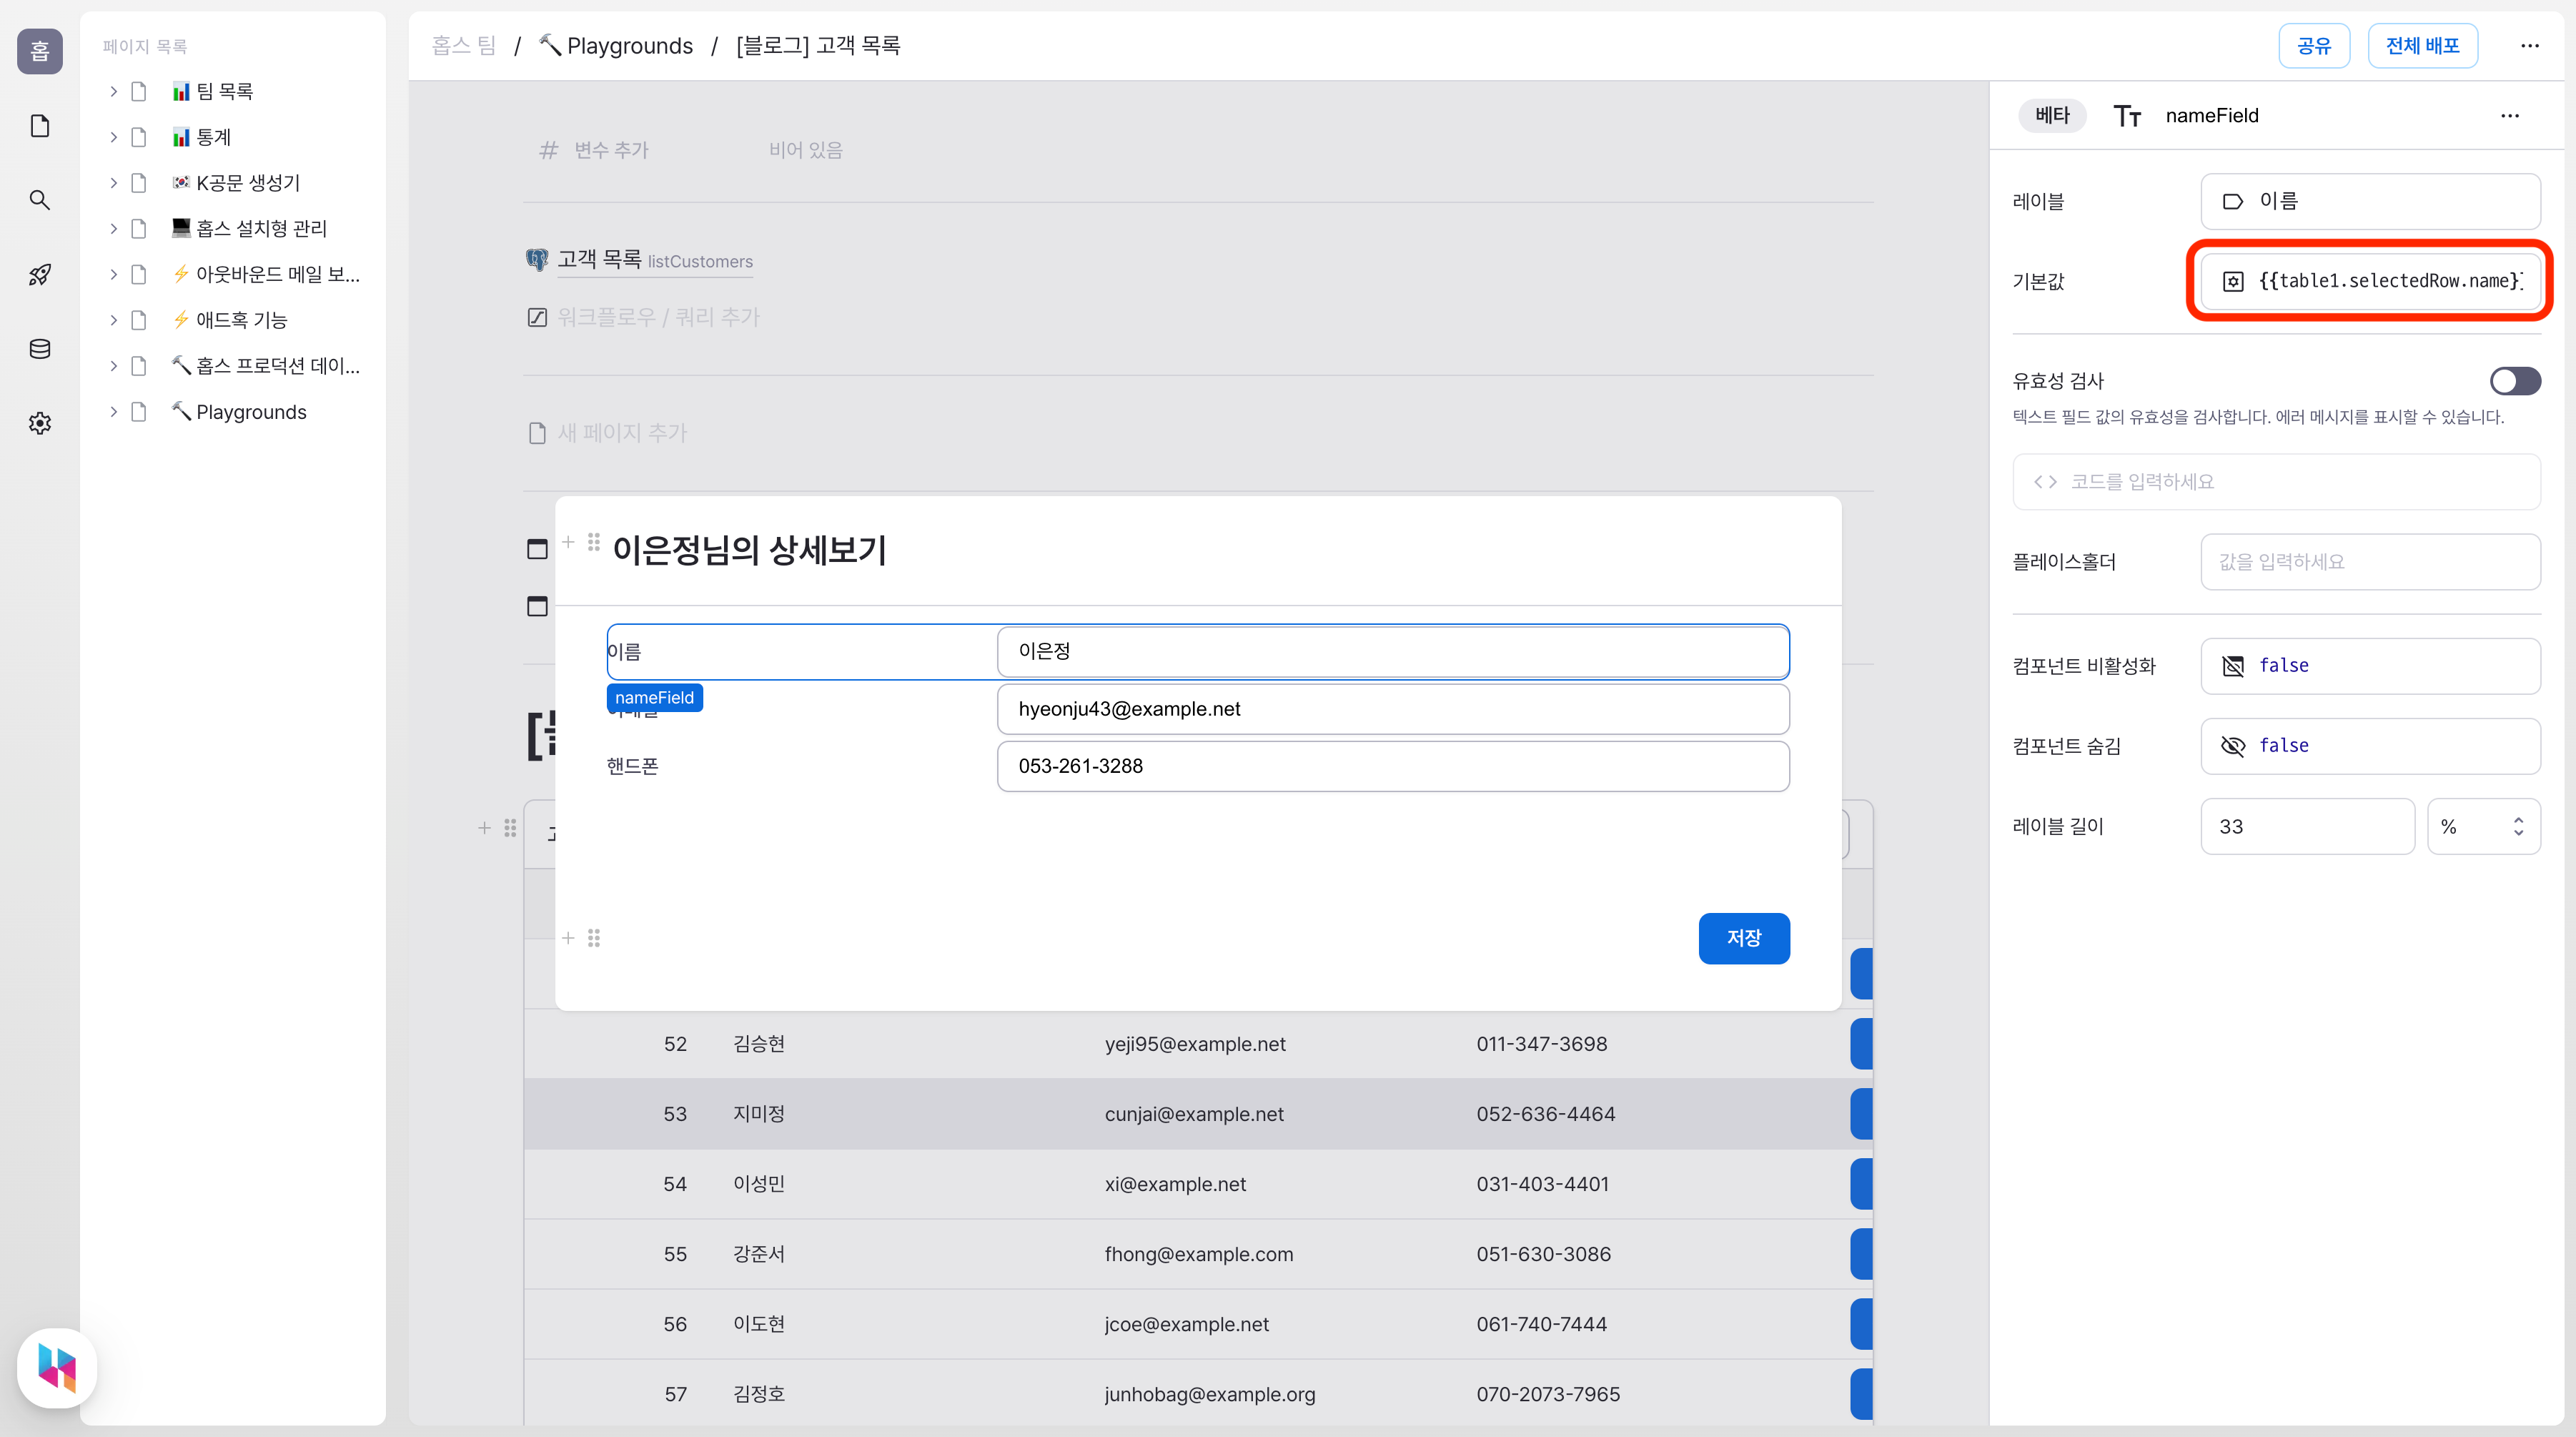
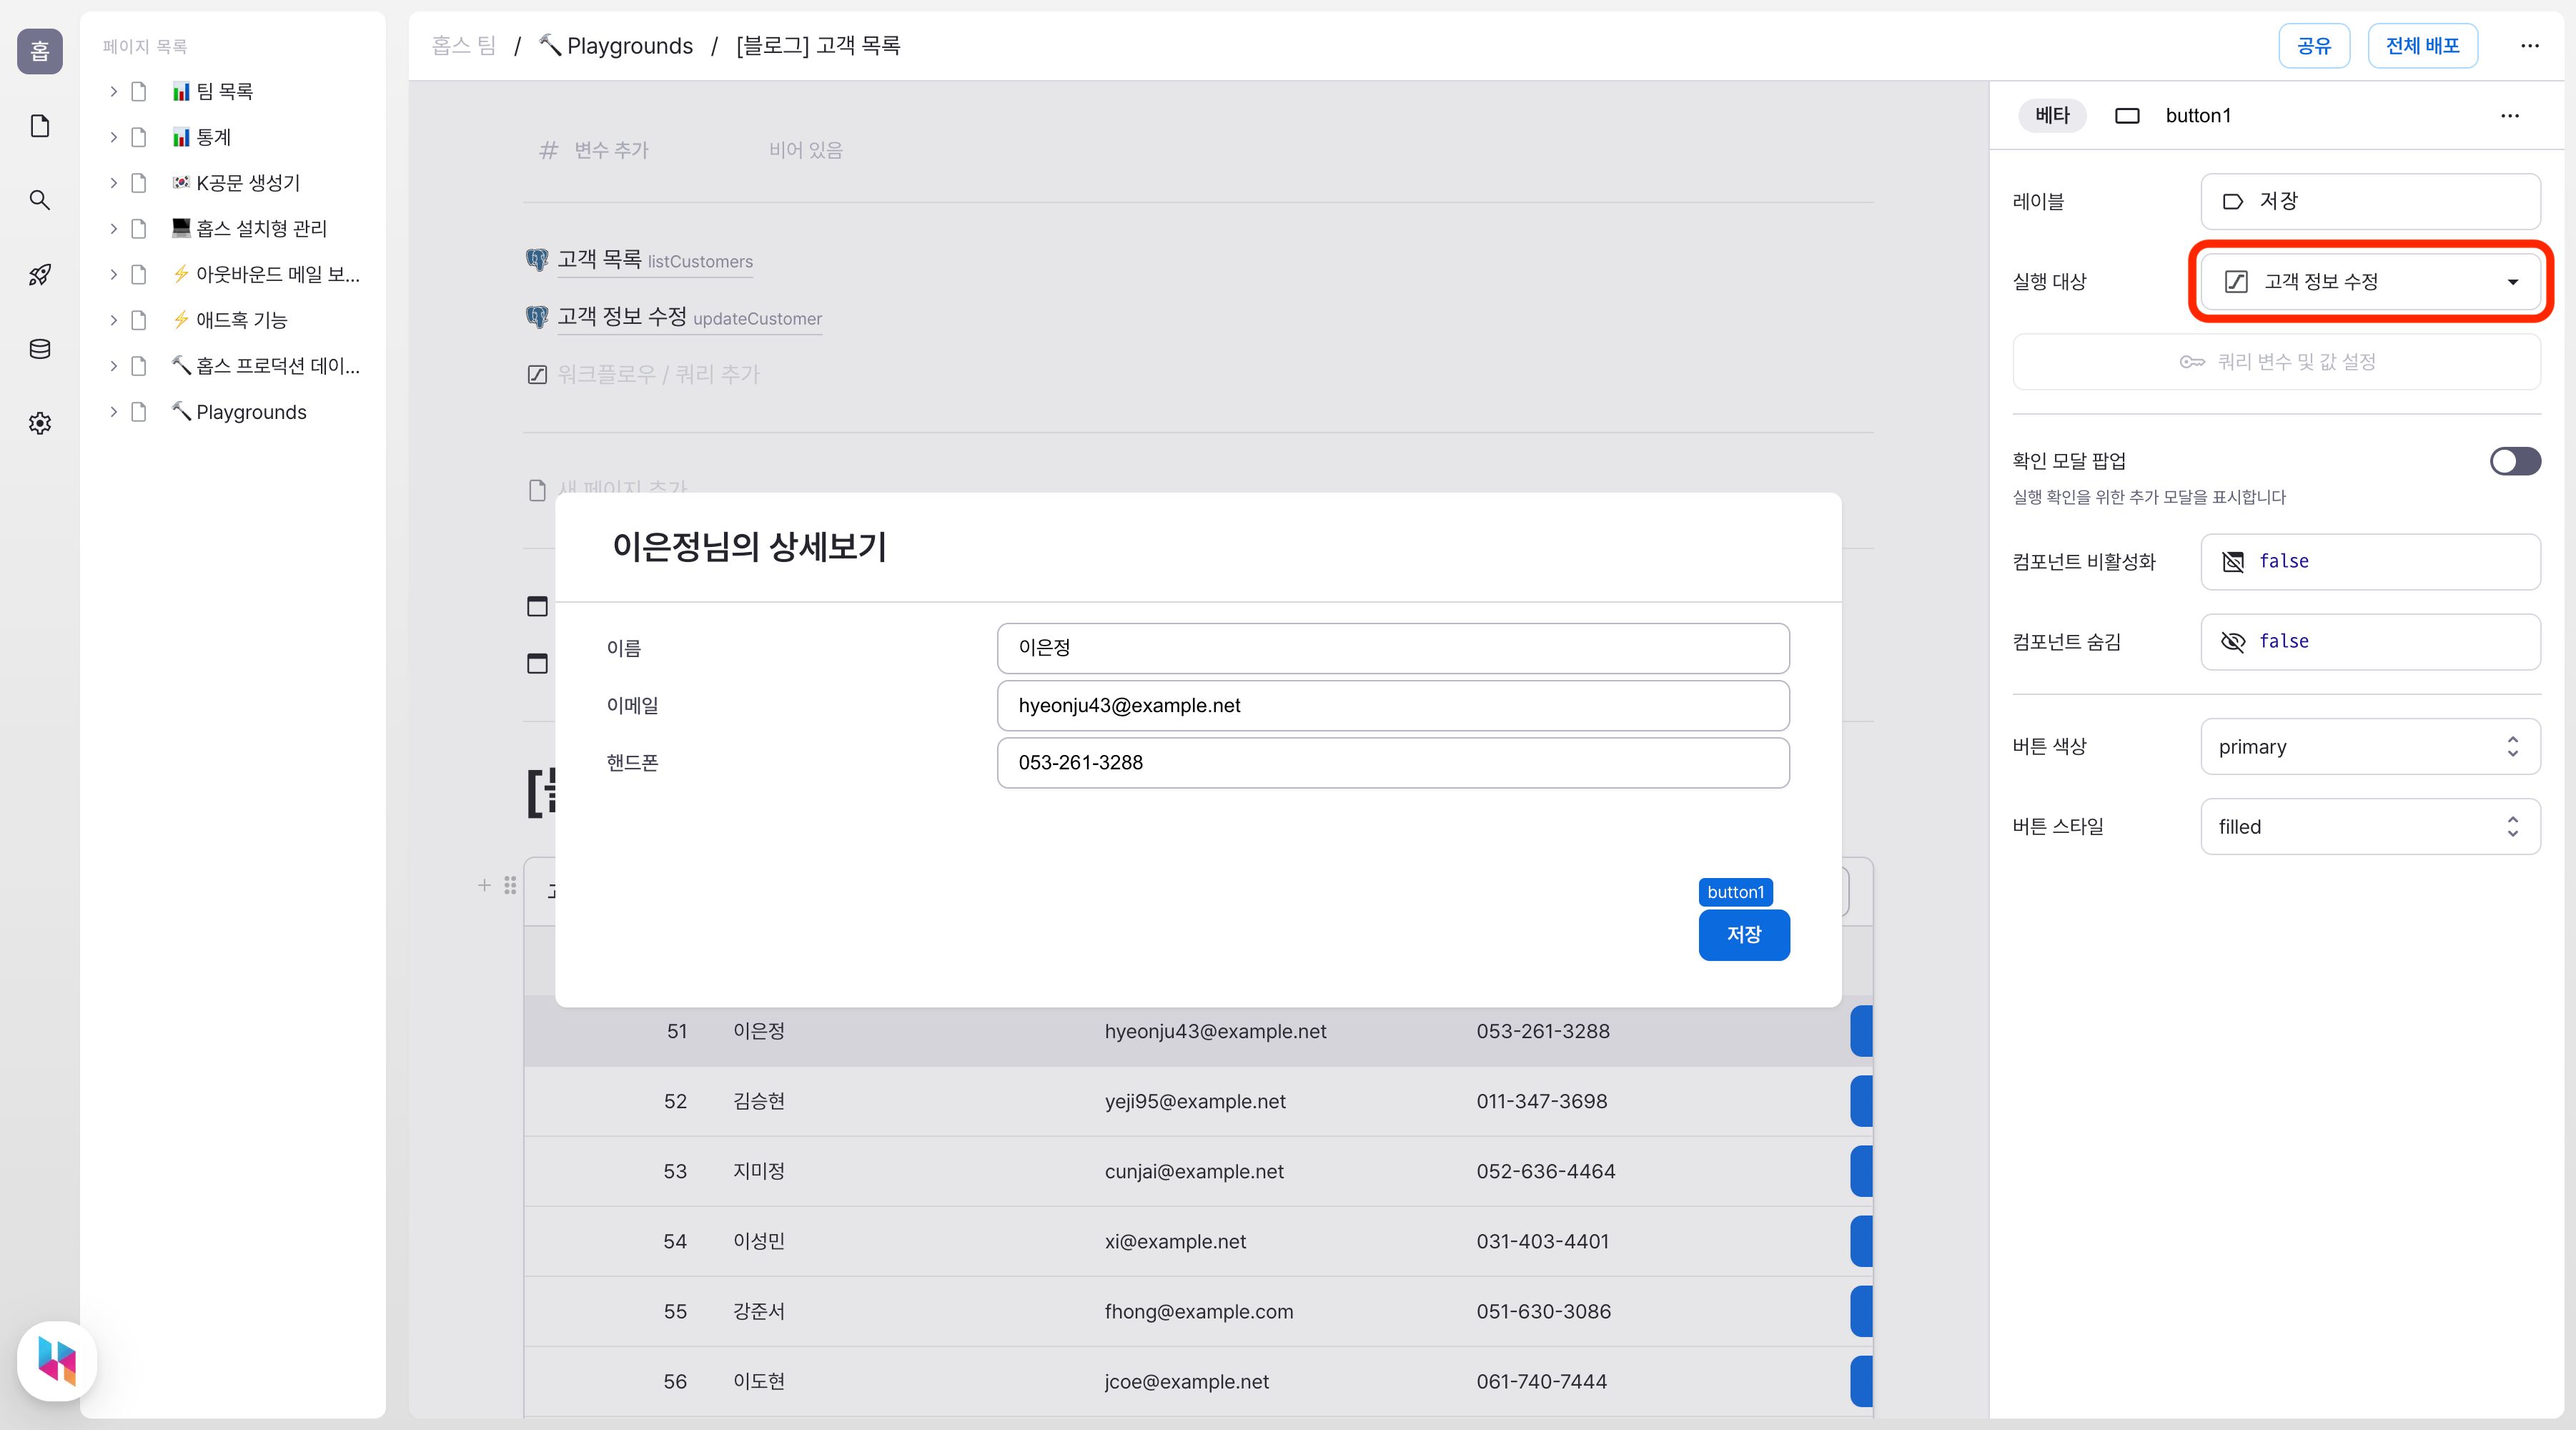
Let's implement the view details feature we prepared earlier. Add a form to the modal that opens when clicking the view button, similar to the create form. This time, we'll need a query to fetch the customer's details.
The selected row's information can be accessed through the table component's selectedRow property. Use this to fetch the specific customer's details.
Add text fields to the form and connect them to the query results to display the customer's information.
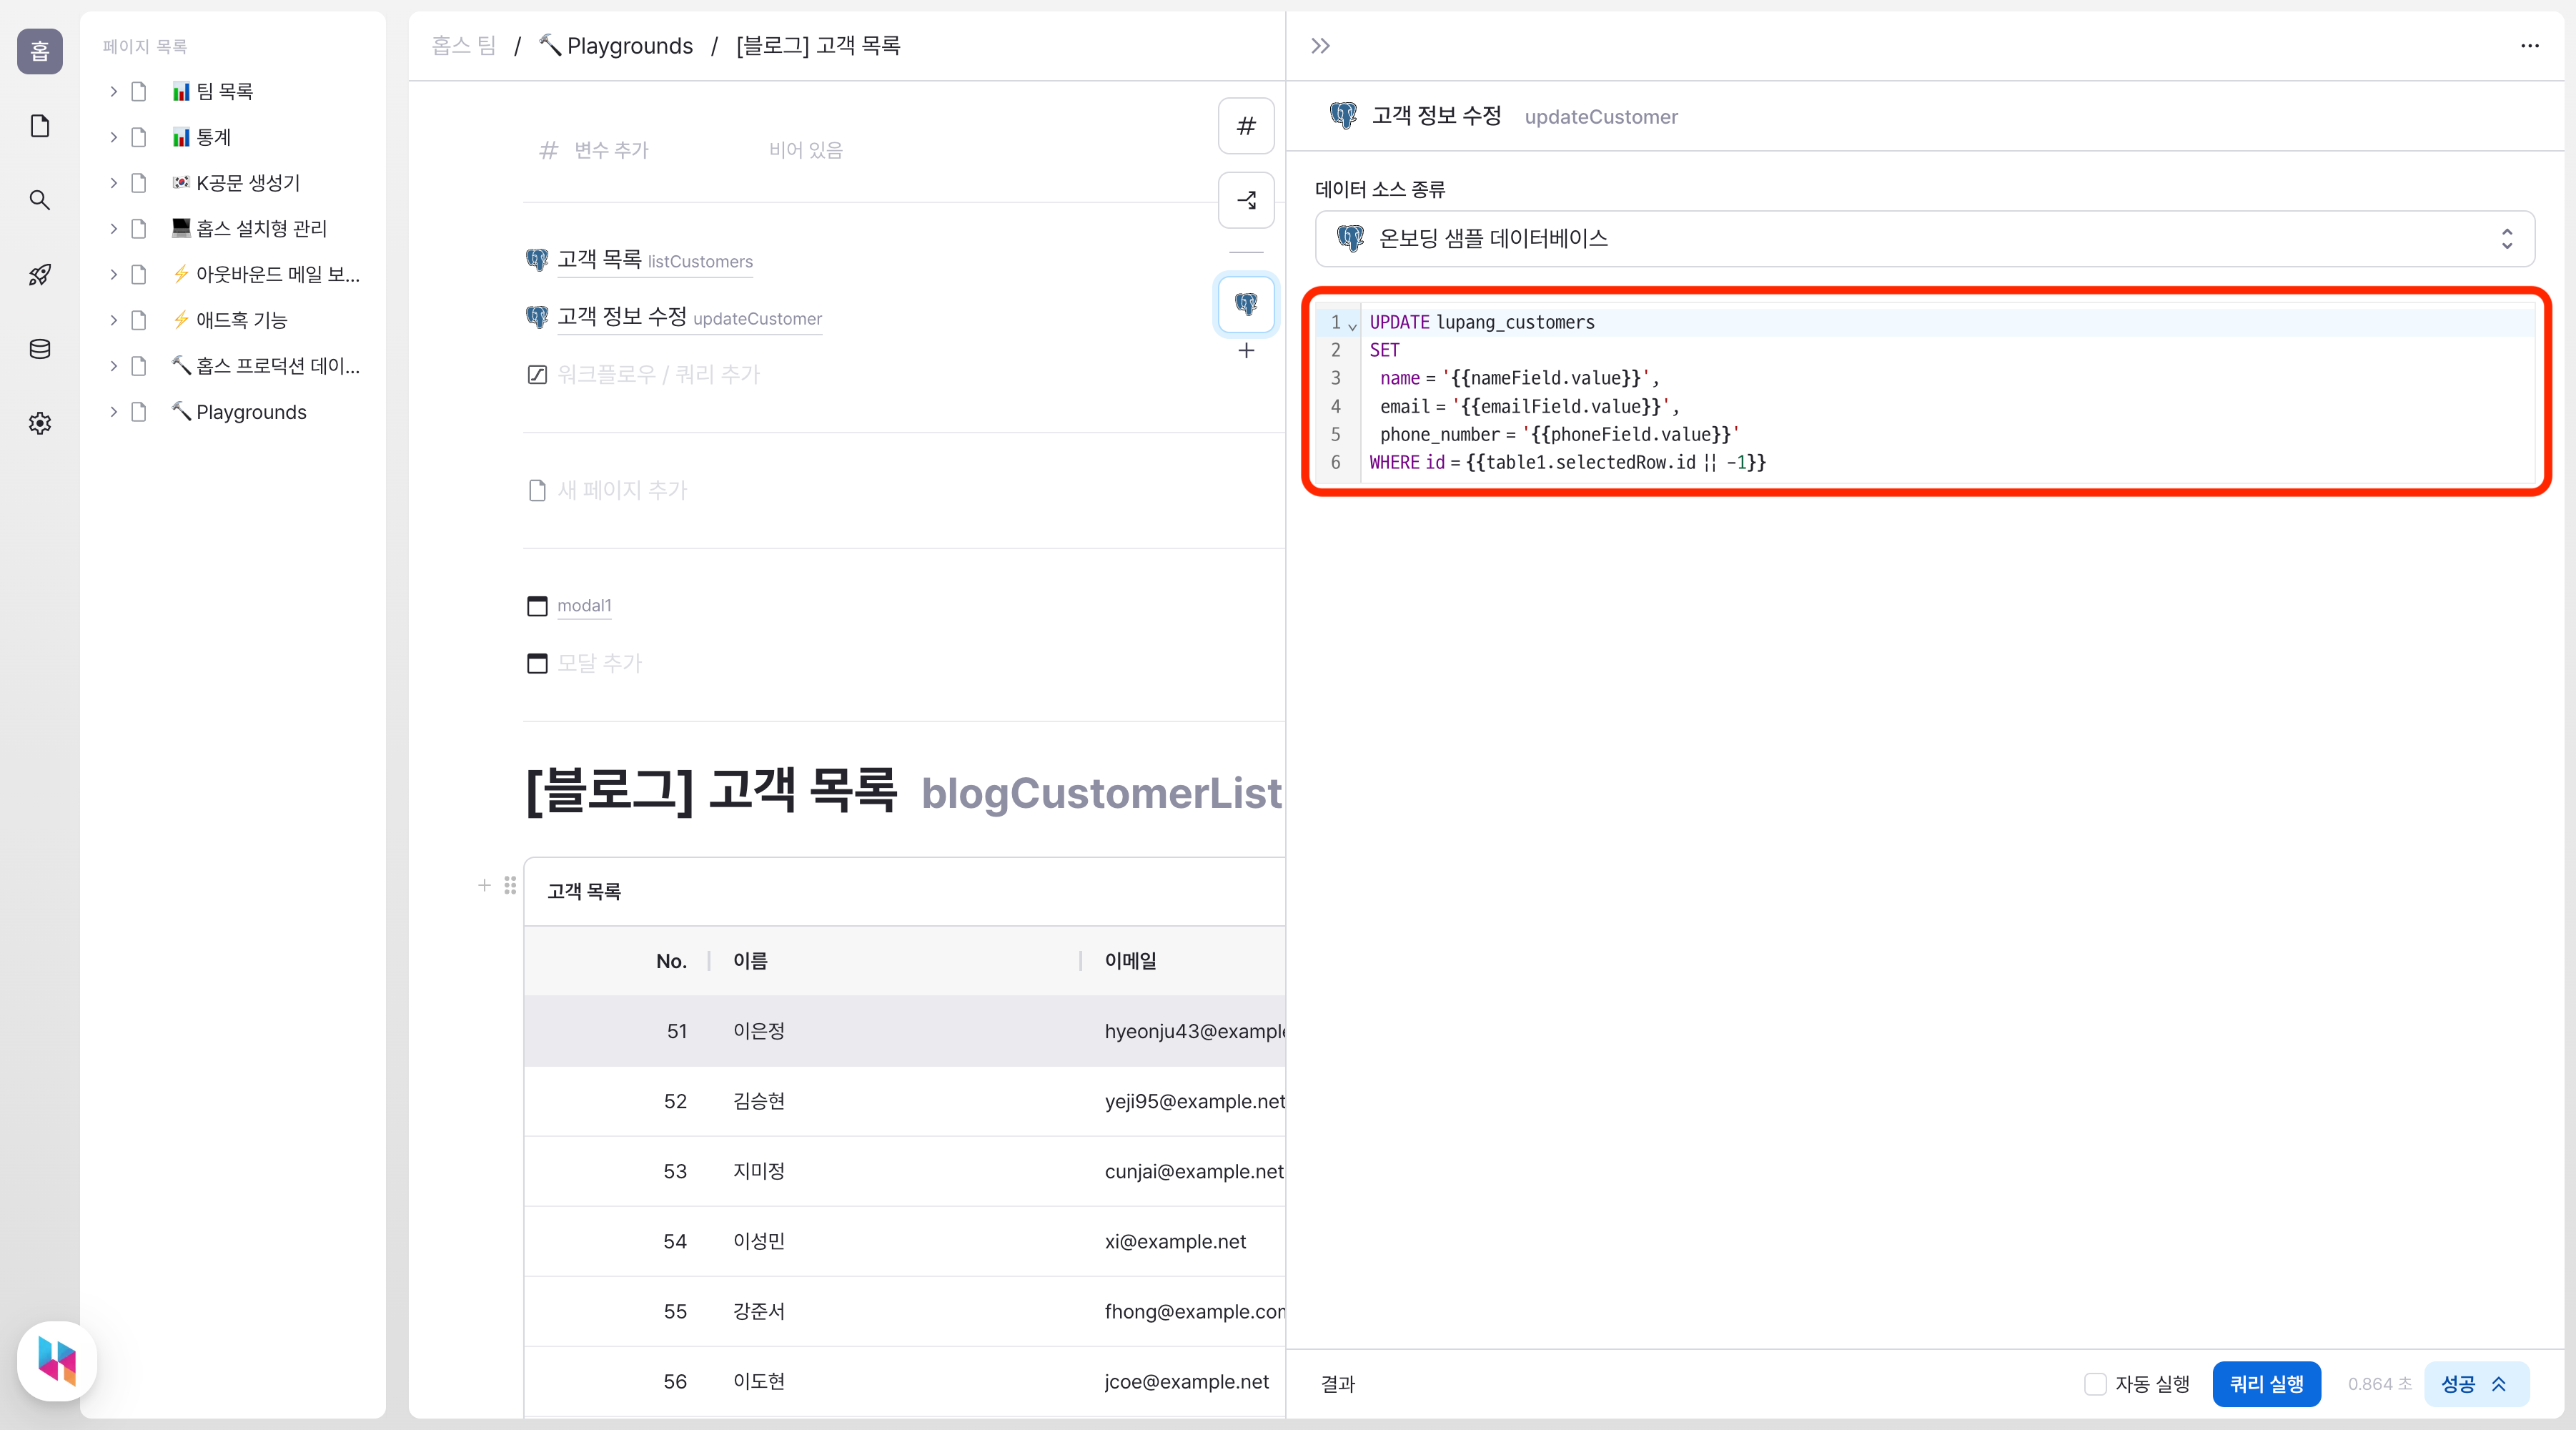
For editing, add an UPDATE query that will be executed when the save button is clicked:
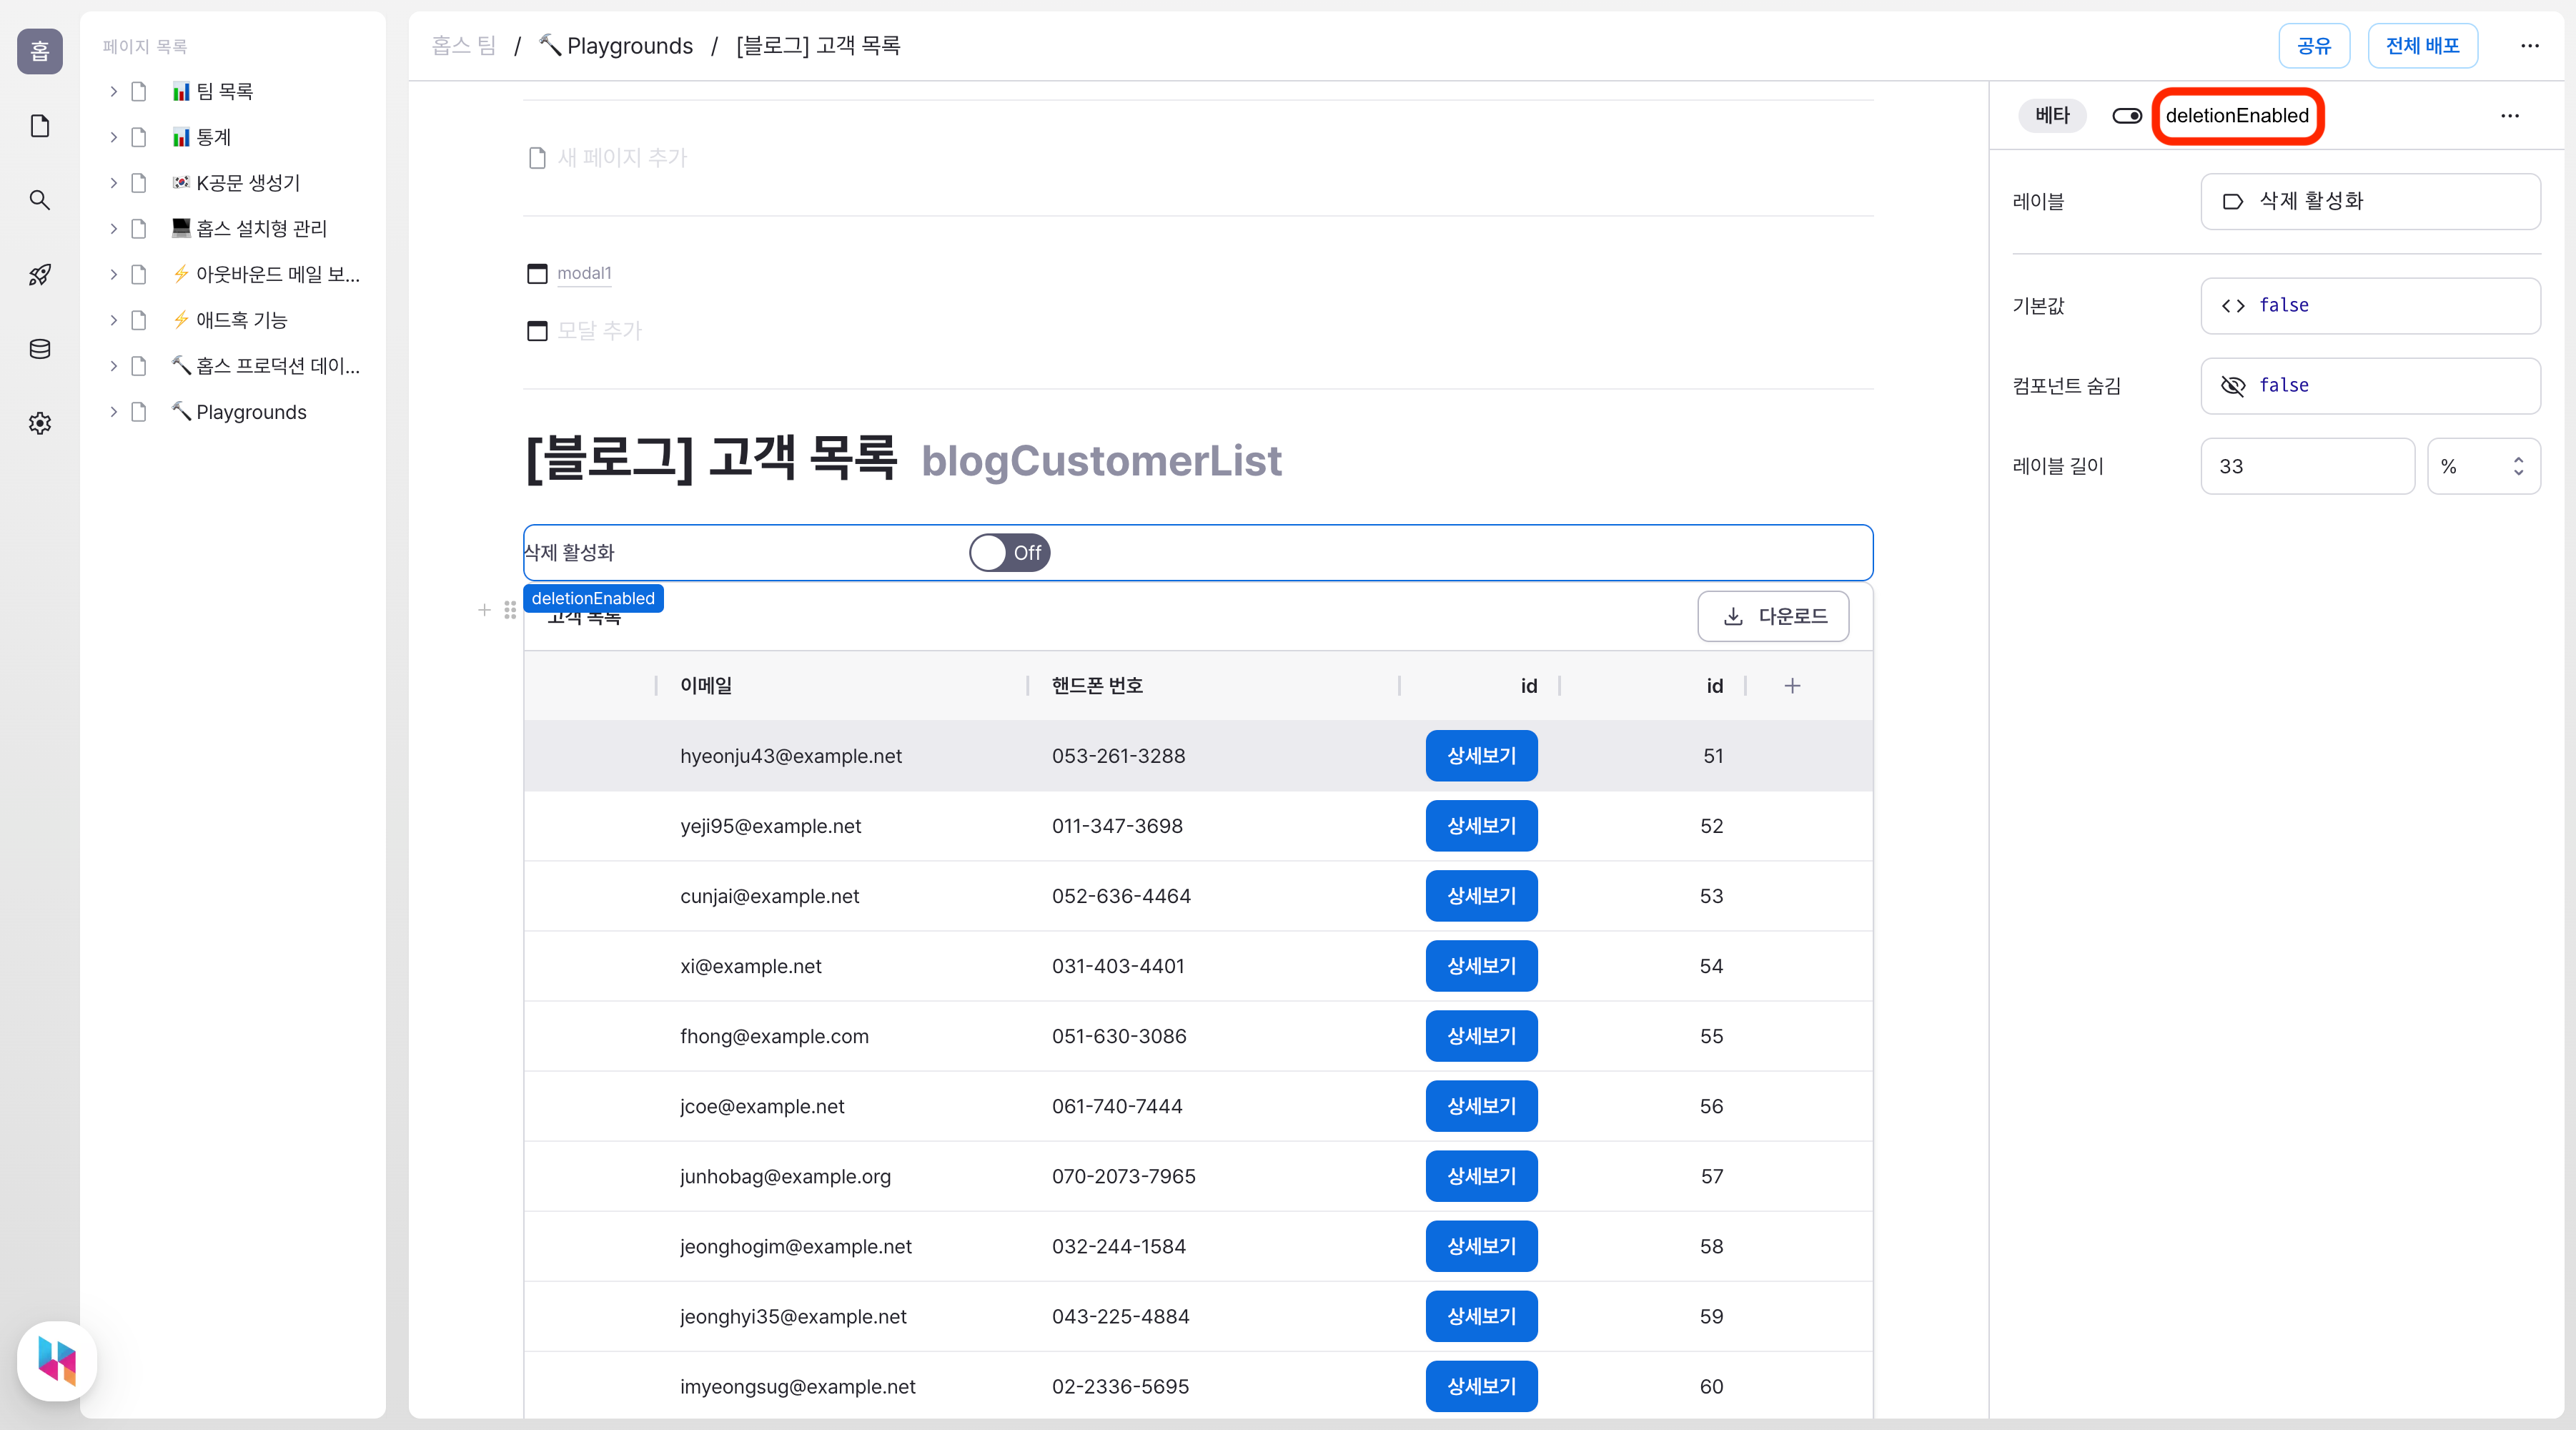
Deleting Data
Finally, let's add the delete feature. Add a delete button to the detail view modal.
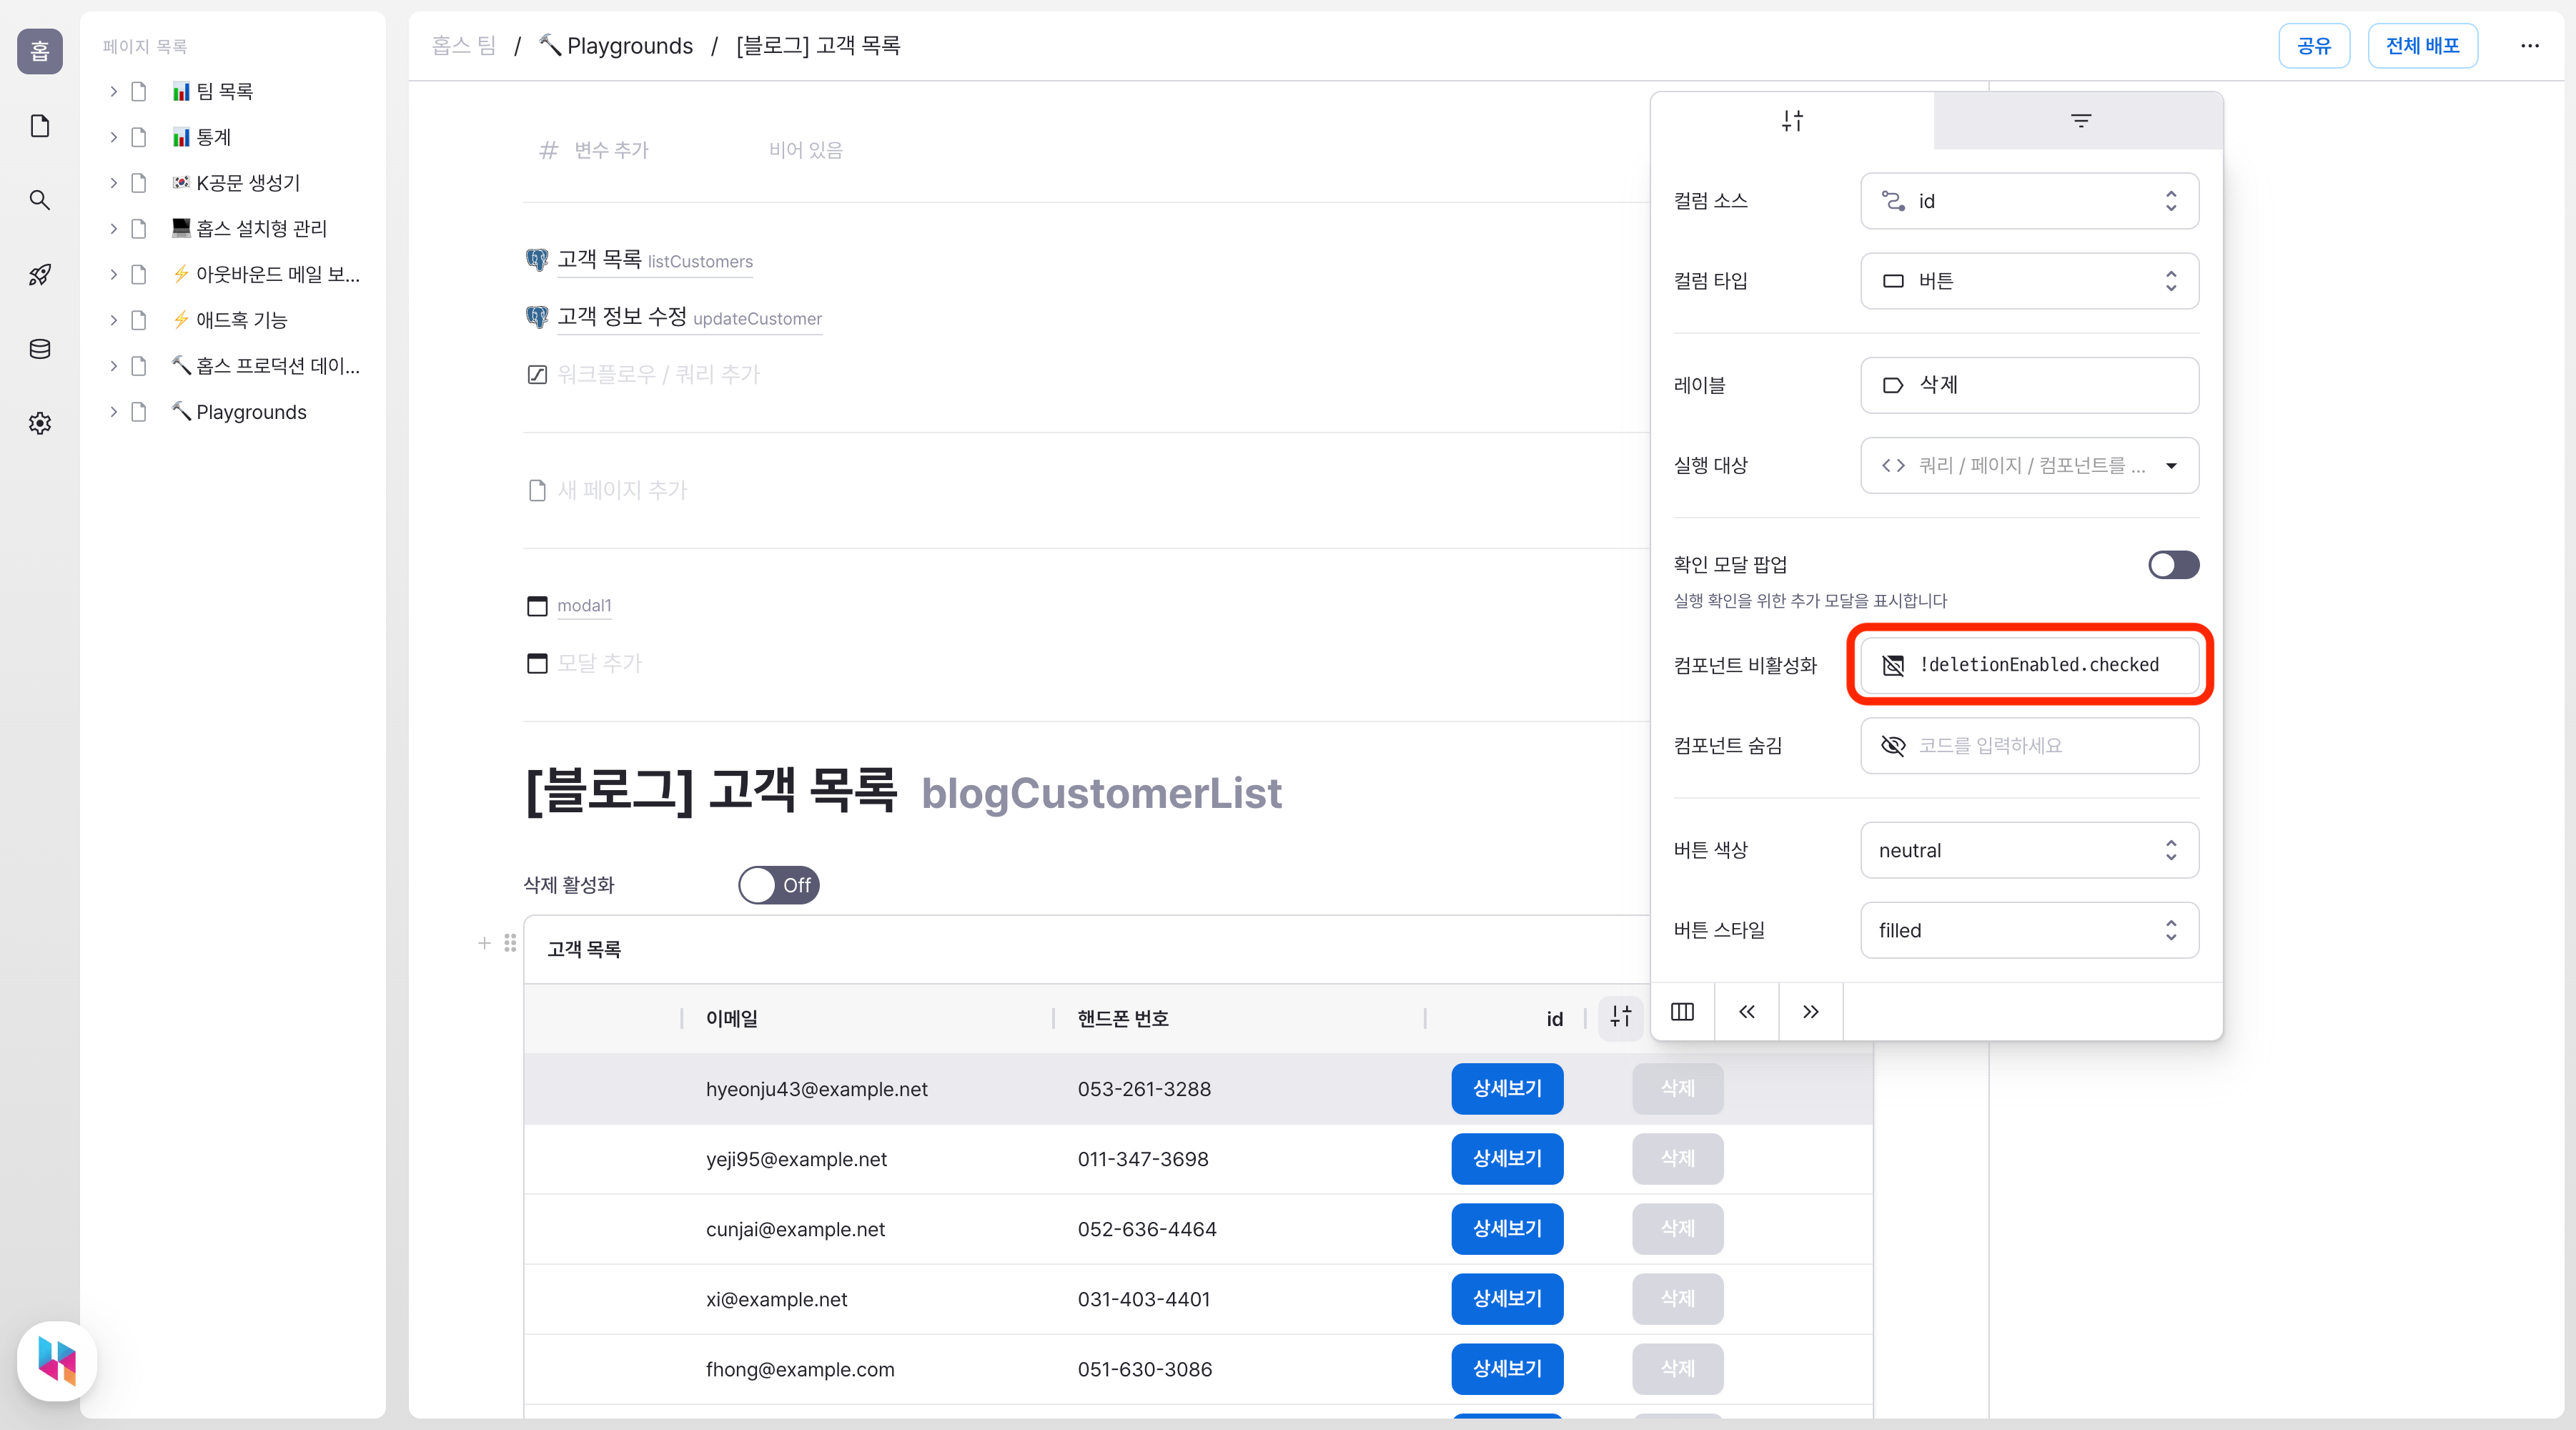
Create a DELETE query that will be executed when the delete button is clicked:
Don't forget to add the list refresh query after the delete operation.
Completion
We've now created a complete CRUD backoffice page. Let's review what we've built:
- A customer list with filtering and sorting capabilities
- A create feature with a form
- A detail view with editing functionality
- A delete feature

Additional Features
The backoffice we created today includes basic CRUD features, but you might need more advanced features depending on your service:
- Data Validation: Add validation to forms using regular expressions
- File Upload: Handle profile images or documents
- Related Data: Display order history for each customer
- Access Control: Restrict certain features based on user roles
- Audit Logs: Track who made what changes and when
These features can all be implemented in Hops without writing frontend code.
Conclusion
Today we learned how to create a basic CRUD backoffice by connecting directly to PostgreSQL. While we used PostgreSQL in this example, the same approach works with other databases like MySQL or SQL Server.
If you're interested in reducing development costs while building backoffice tools, please contact the Hops team anytime.
From information architecture to screen layout, we'd love to discuss any admin-related concerns you have.
Please schedule a time through this link.