When sending emails or text messages to customers, we often need to send messages in predefined formats, such as refund notifications or point modification notices, where we just change the customer's name or specific information.
Here's how to create an email sending service with email template functionality.
Before We Start
We'll create a system to send messages in the following order, so please follow along. Once you become familiar with Hops, you'll be able to create these backoffice pages in about 5 minutes.
- Email Configuration
- Viewing Customer Data
- Email Content Edit Modal
- Email Sending Workflow
- Repeated Workflow Execution for Multiple Selected Data
Email Configuration
Hops supports SMTP as a data source for sending emails.
Email services like Google Workspace or Outlook provide SMTP capabilities for sending emails, so please refer to your email service's documentation for specific SMTP configuration values.
Since I use Google Workspace, I'll use Google's SMTP server. By adding the data source as shown below, you can send emails through the SMTP server in workflows.

Viewing Customer Data
Let's display customer data in a table and allow the operations team to select customers to send messages to. First, we'll fetch customer information from the database.

Set the workflow to table data and choose "multiple" from row selection methods to allow selecting multiple customers. You can change settings through clicks in the settings window.

Email Content Edit Modal
Once we can select customer data in the table, we'll create a modal to verify the message to be sent and send emails.


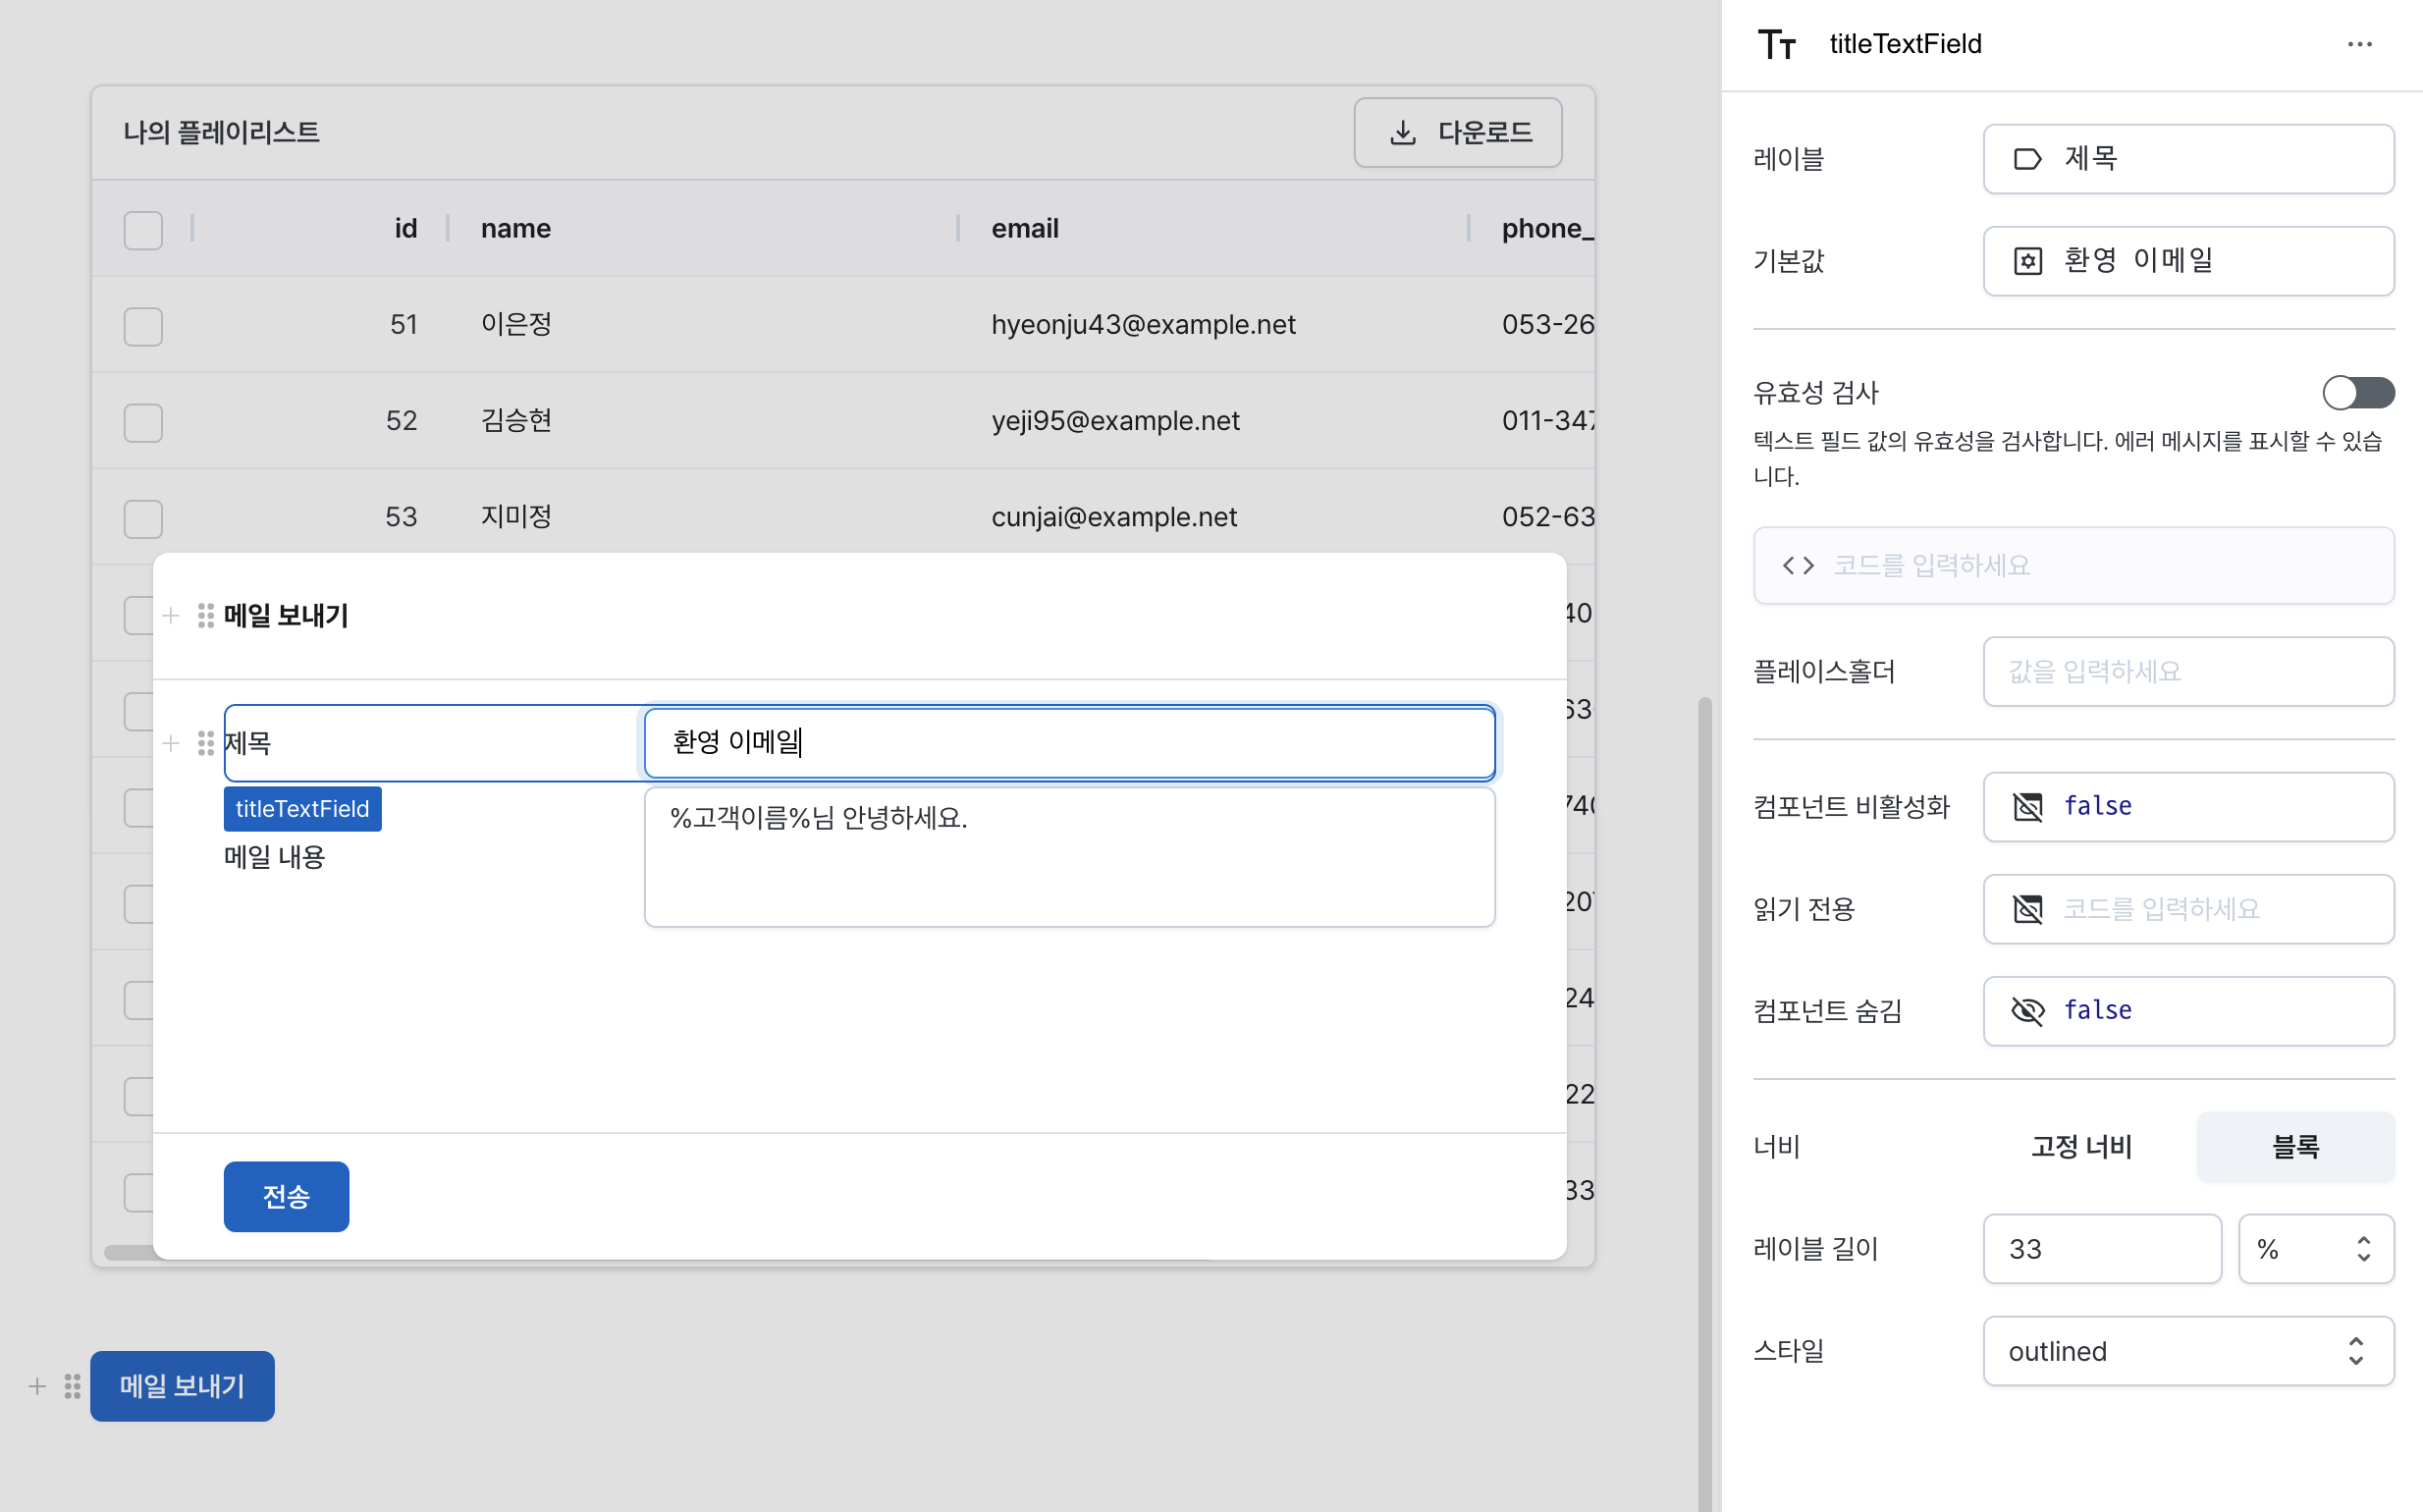
In the modal, we'll use text field and text area components to write and allow modification of default message formats.
Since some email personalization is needed, we'll also add functionality to replace the word "%CustomerName%" in the email content with the customer's name.
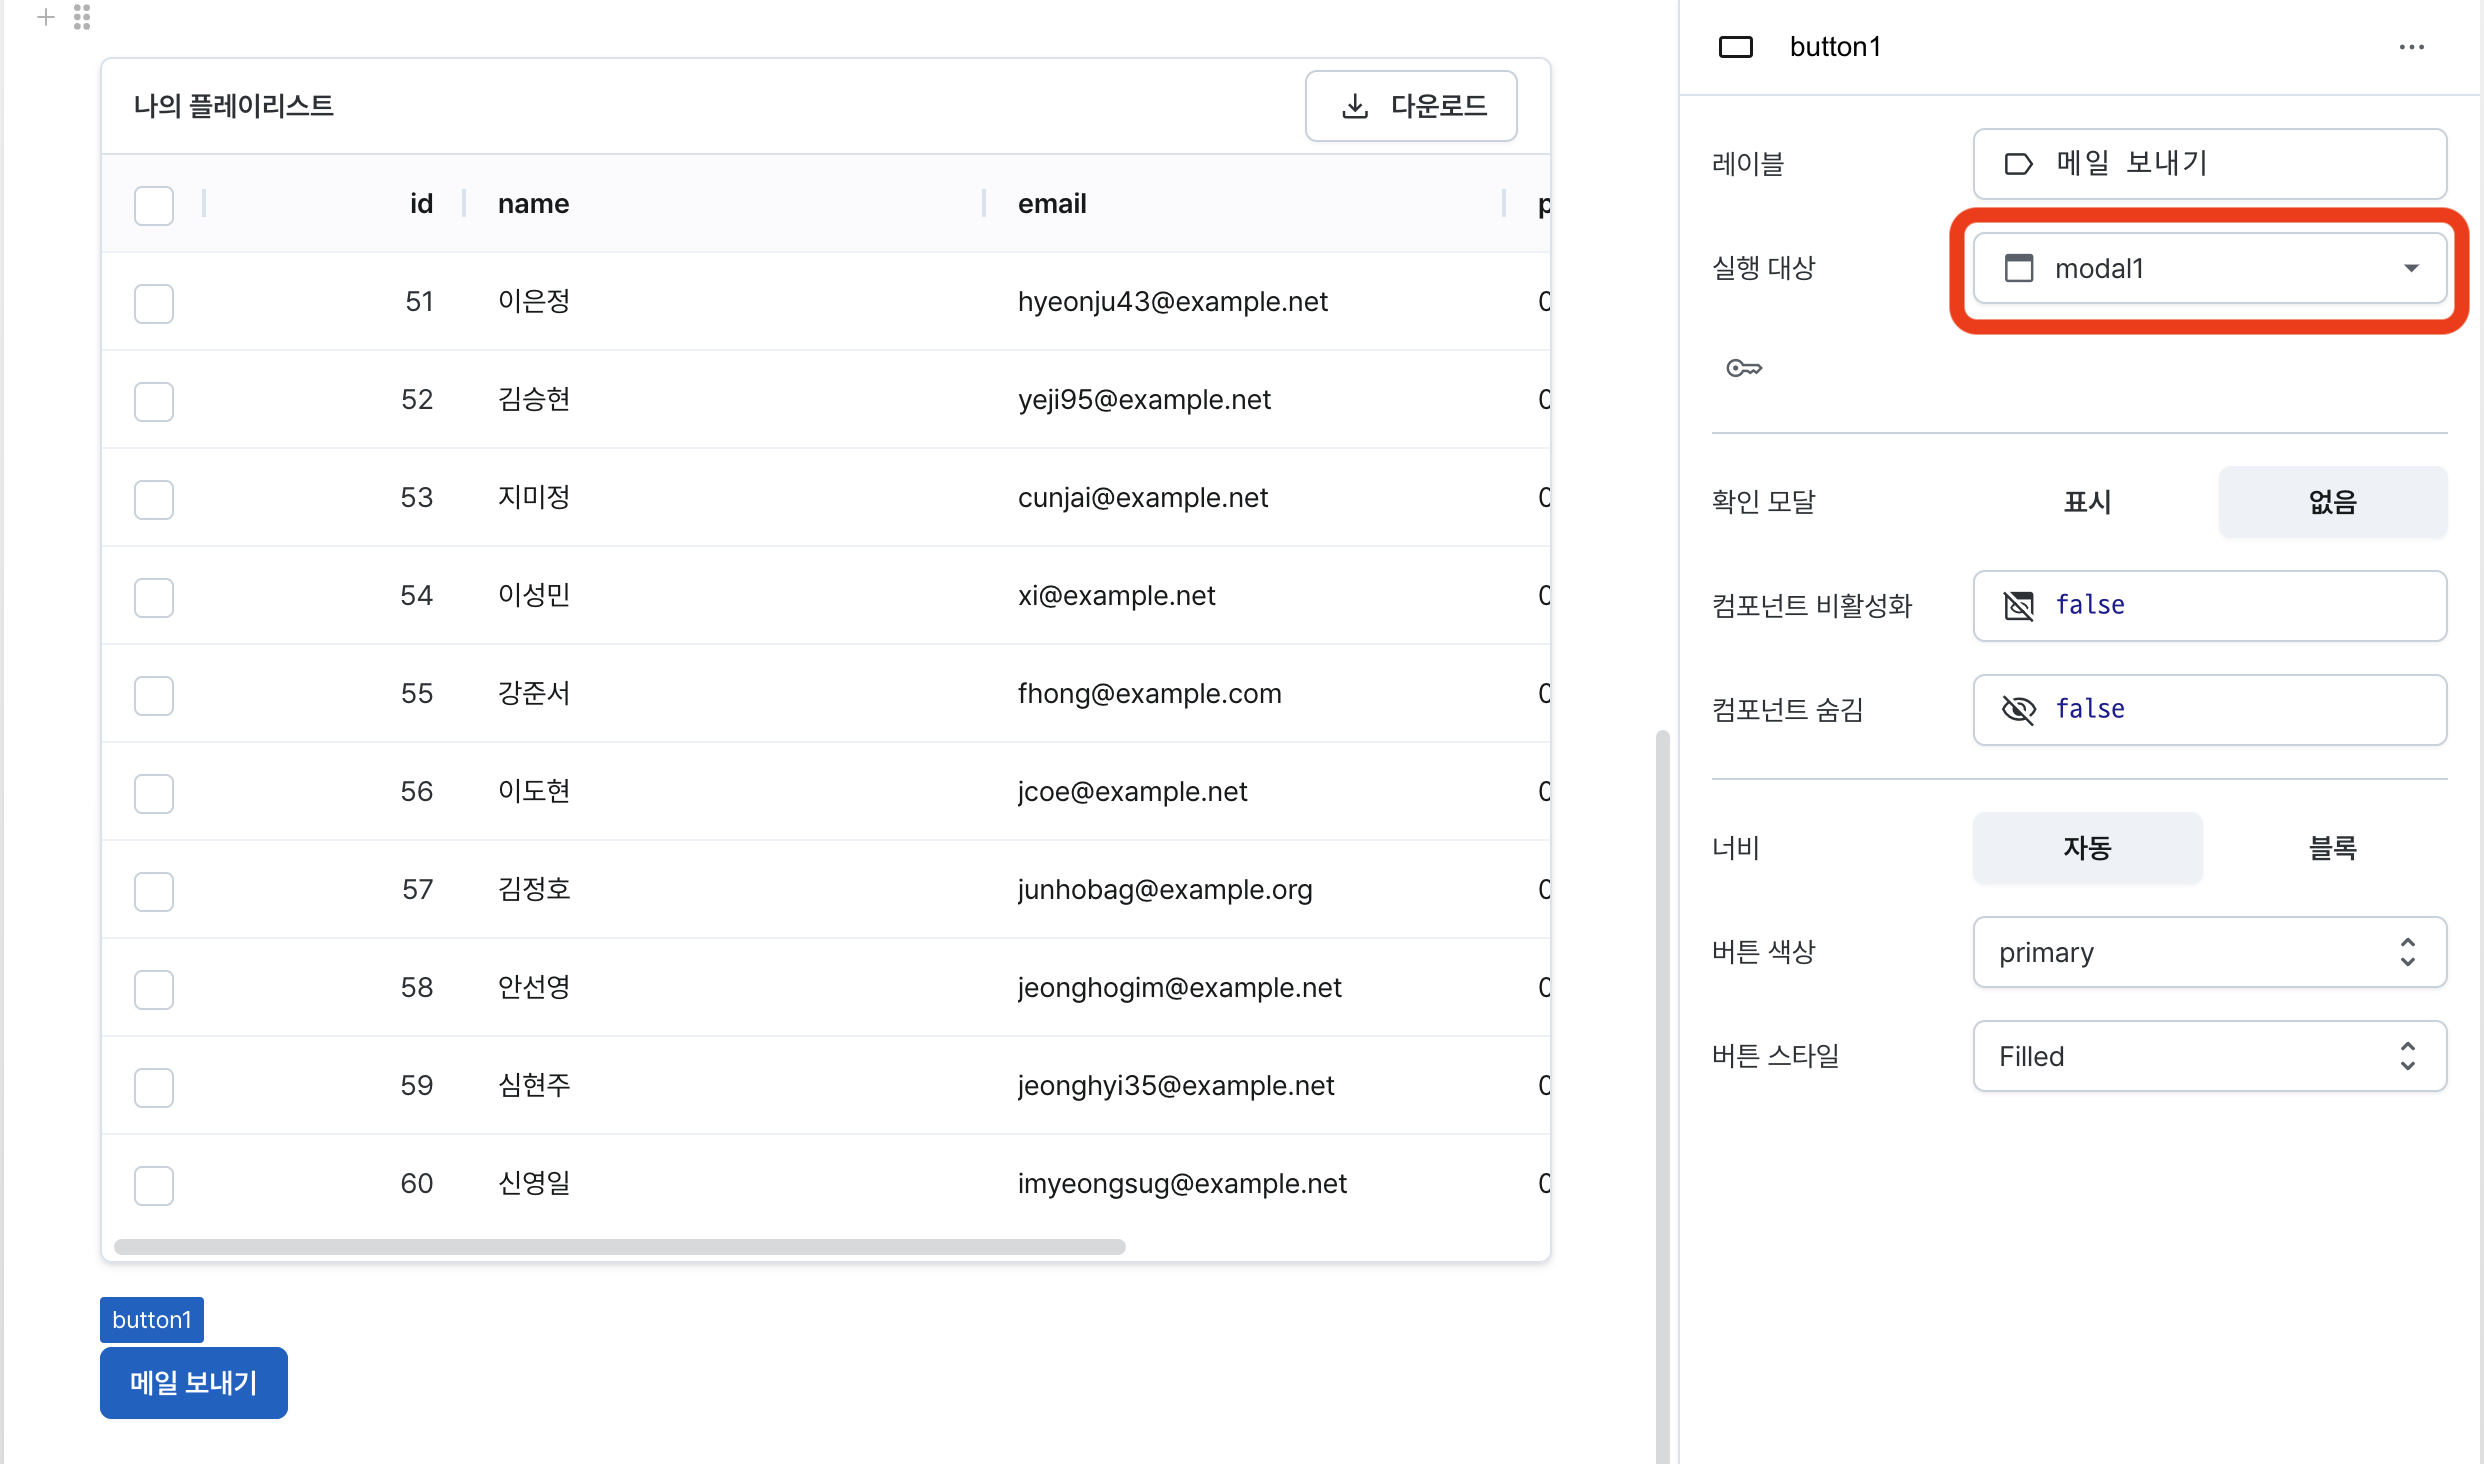
After adding the modal, create a send email button on the page and select the modal in the execution target.
Email Sending Workflow
We'll add an email sending workflow and configure it to run repeatedly to send emails to multiple customers.


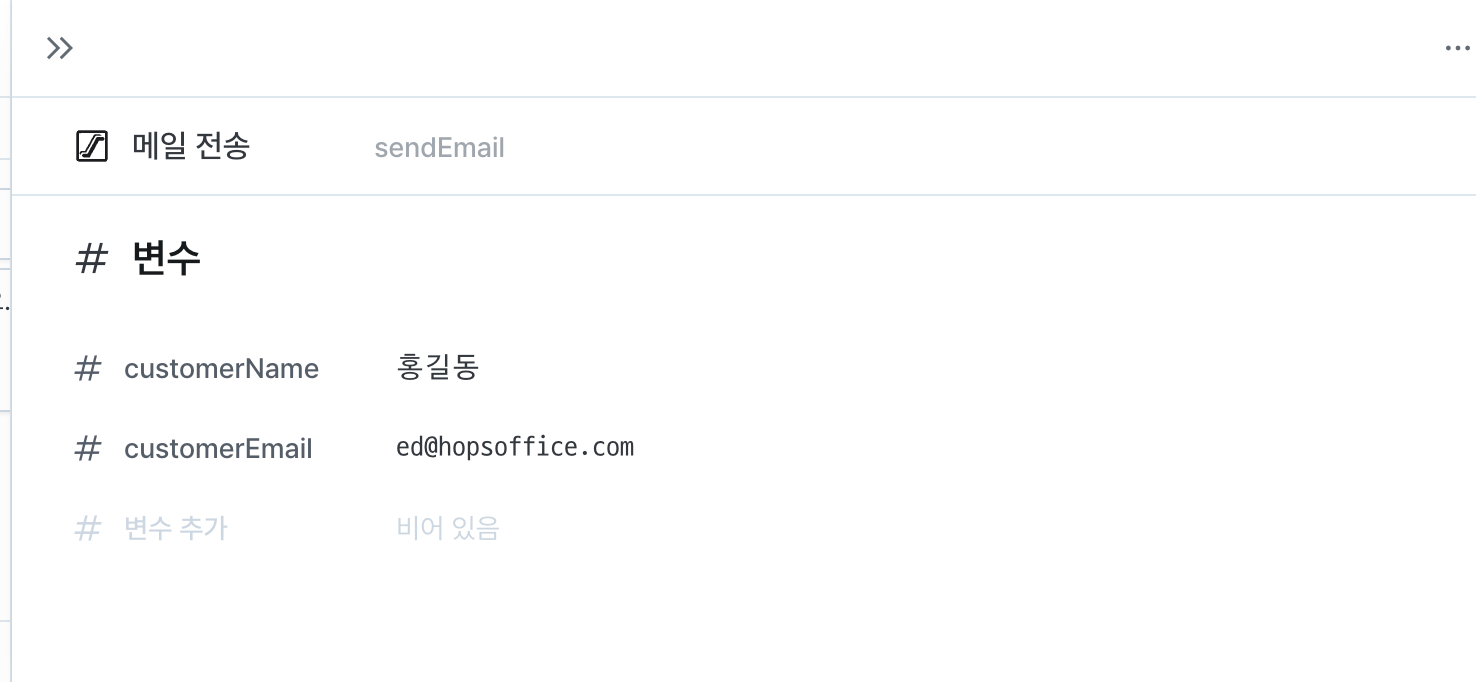
For this, we need to receive customer names and emails that change during repetition as variables. Set customerName and
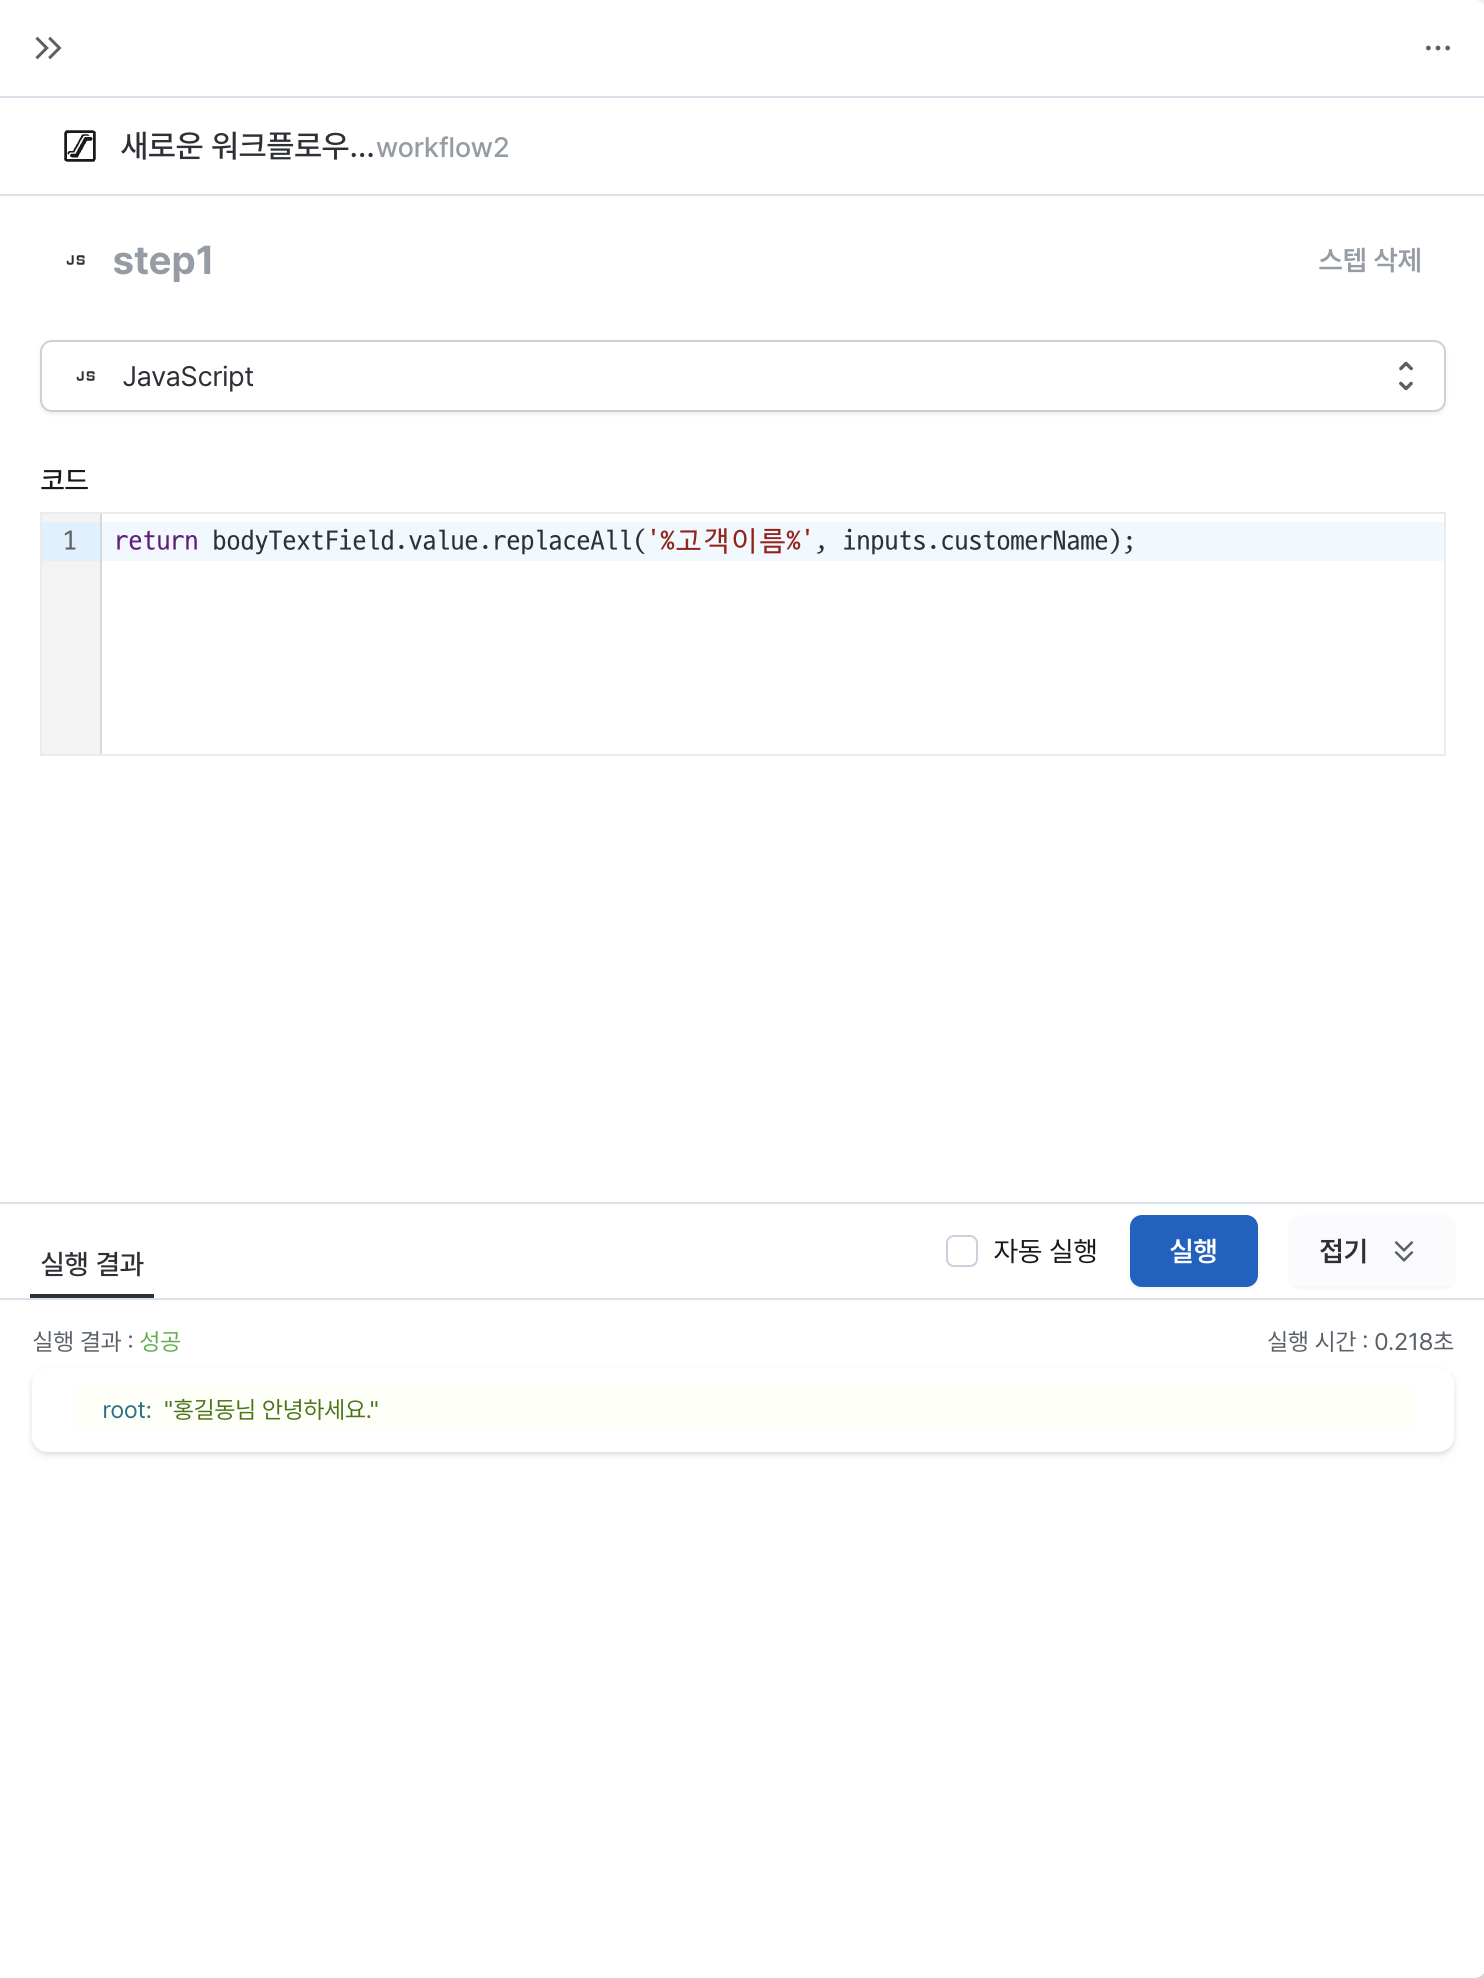
customerEmail as variables in variable settings. Add JavaScript that replaces message content using the inputs.customerName variable.

Add another step in the workflow and input the recipient email address received as a variable, the subject entered in the modal, and finally the JavaScript execution result containing the customer name to complete the email sending workflow.
Repeated Workflow Execution for Multiple Selected Data
Hops provides repeated execution functionality to run workflows multiple times. table1.selectedRows holds selected
customer data as an array. Enter this data into the "Repeat Execution" data source array.

Change the data source within the repetition to "Execute Other Workflow" to send emails. When you select the email sending
workflow we just created, you can input variables. Since table1.selectedRows is currently an array in the form
[ { email: "sample@example.com", name: "John Doe" } ], we can get the customer email as {{ item.email }} and
customer name as {{ item.name }}. Put this data into the pre-set variables.

Workflow configuration is now complete. Finally, add a button below the table and set it to execute the repeat execution workflow to complete all feature additions. Now test by pressing the send button, and emails will be sent as shown below.


Conclusion
Finally, let's deploy the page through the deploy button so all team members can use it.

A page for sending emails to multiple customers has been added. You can select customers from the table and press the button to send personalized emails to each customer.

Need an backoffice with features like this? Let us know your schedule through the link below. We'll introduce you to Hops, where you can create a customer notification email sending backoffice in just 10 minutes.
From information architecture to screen layout, we'd love to discuss any admin-related concerns you have.
Please schedule a time through this link.
